Category: Concrete & Foundations

Pouring Masonry in Heat, Cold, and Rain

People think of masonry and concrete as inert, like once it is placed the weather stops mattering. The opposite is true. The hours and days right after a pour or a lay-up are when weather decides how strong the finished work will be, and I have seen good material ruined by nothing more than bad timing. Out in the desert the enemy is heat and dry wind; up north it is cold. Either way, if the weather is wrong when the work goes in, the work suffers.
Pouring Masonry in Heat, Cold, and Rain
Photo: Wonderlane · CC0 1.0

Why the curing window is everything

Concrete and mortar do not “dry”, they cure, a chemical reaction called hydration that needs water and moderate temperature to build strength. Rush that reaction or starve it of moisture and you get weak, crack-prone material no matter how good the mix was. The first 24 to 48 hours matter most, and the first week is still critical. Weather that pushes the reaction too fast or too slow is what causes the failures.

Hot, dry weather: the desert problem

In heat like ours, the danger is the surface drying out before it can cure. Water evaporates faster than hydration can use it, and you get shrinkage cracking, dusting, and a weak surface. The defenses:

  • Pour early morning or evening, not midday sun
  • Dampen substrates and forms so they do not wick water out of the mix
  • Keep the surface moist, fog, wet burlap, or curing compound, for days, not hours
  • Provide shade and block hot drying wind where you can

The monsoon adds its own twist, so a pour timed against incoming desert storms is its own planning exercise, related to the damage I cover in how salt and de-icers damage masonry once material is compromised.

Cold weather: the northern problem

Cold is the mirror image. Below about 40°F, hydration slows dramatically, and if fresh concrete or mortar actually freezes before it has gained enough strength, the water inside expands and destroys it from within, often a total loss. Cold-weather practice means heated materials, insulated blankets or enclosures, admixtures that speed set, and simply not laying masonry in a hard freeze. This is why crews in freeze-prone regions shut masonry down in deep winter rather than risk it.

The mild-weather sweet spot

The ideal is moderate temperature, roughly 50°F to 80°F, moderate humidity, and no driving wind or rain on fresh work. Rain is its own hazard: a downpour on green concrete washes out the surface and dilutes the mix. A good contractor watches the forecast and reschedules rather than fighting the weather, and honestly that willingness to wait a day is a sign you hired the right one. Placement and curing standards are published by the Concrete Masonry and Hardscapes Association. The material is only as good as the conditions it cured in.

What a good crew does about the forecast

The tell of a serious contractor is how they treat the weather forecast, because the fixes are all about planning rather than heroics. In heat, a good crew shifts the pour to early morning, has the curing materials, burlap, plastic, curing compound, or a sprayer, staged before the truck arrives, and dampens the subgrade and forms ahead of time so they do not steal water from the mix. In cold, they arrange heated water or aggregate, insulated blankets or an enclosure, and sometimes an accelerating admixture, and they protect the finished work for days, not hours. And when the forecast is genuinely bad, a driving rain on the day of a flatwork pour, a hard freeze the night after, the right move is simply to reschedule. I have far more respect for the contractor who calls to push a pour two days than the one who forges ahead and hands me cracked, dusty concrete a week later. If yours wants to pour into a storm or a freeze on schedule rather than lose a day, that is worth questioning; the weather window is not a detail, it is part of the job.

Frequently asked questions

Can you pour concrete or lay masonry in any weather? No. Extreme heat dries the mix before it cures, causing shrinkage cracks and weak surfaces, and freezing temperatures can destroy fresh material outright. The best conditions are moderate, roughly 50°F to 80°F, with no driving wind or rain. Good contractors reschedule rather than fight bad weather.

What happens if concrete freezes before it cures? The water inside expands as it freezes and breaks the material apart from within before it has gained strength, often ruining it completely. That is why cold-weather masonry uses heated materials, insulated enclosures, and admixtures, or is postponed until a hard freeze passes.

Why does concrete crack in hot weather? Because water evaporates from the surface faster than the curing reaction can use it, causing shrinkage cracking, dusting, and a weak surface. Pouring in the cooler part of the day and keeping the surface moist for several days prevents most heat-related cracking. Long hot seasons make that the default working condition rather than the exception; an Austin masonry contractor plans the pour around dawn for most of the summer.


Cracked Concrete Steps and Stoops: Repair or Replace?

Up in Menasha and around the Fox Valley, I have rebuilt more front steps than I could count, and the reason is always the same: Wisconsin winters are murder on concrete stoops. Water gets in, freezes, expands, and over enough winters it turns a solid step into a crumbling, tilting hazard. The question every homeowner asks is whether to patch it or tear it out, and there is a real line between the two. Cross it and patching is throwing good money after bad.

Cracked Concrete Steps and Stoops: Repair or Replace?
Photo: U.S. Navy photo by Mass Communication Specialist 1st Class Michael B.W. Watkins · PDM

What freeze-thaw does to a stoop

Concrete steps take the worst of everything: they are horizontal so they hold water, they get hit with snow and de-icing salt all winter, and up here they go through dozens of freeze-thaw cycles a year. Water seeps into small cracks and pores, freezes, expands about nine percent, and levers the concrete apart from the inside. Add salt, which drives more freeze-thaw cycles and attacks the concrete chemically, and a stoop that looked fine five years ago starts spalling, cracking, and pulling away from the house.

When a repair is worth it

Repair makes sense when the damage is surface-level and the structure underneath is sound:

  • Spalled or chipped surfaces and edges, patchable with the right bonding repair mortar
  • Small cracks that are not moving
  • A single worn tread on an otherwise solid stair

Done properly, with a real bonding agent and a repair mix rated for freeze-thaw, these patches hold. Done with a smear of bagged concrete on a dirty surface, they pop off by spring.

When replacement is the honest call

Tear it out when the problems are structural:

  • The stoop is tilting, settling, or pulling away from the house (a foundation or base problem)
  • Large sections are crumbling or the reinforcement is exposed and rusting
  • Cracks are wide, growing, or run all the way through
  • The steps have become a trip or fall hazard, this is a safety issue, not a cosmetic one

Steps are an egress and safety element, and building codes set requirements for riser height, tread depth, and railings; those standards are coordinated through the International Code Council and enforced by your local building department. A replacement is the chance to get those right if the old ones were not.

Cost and prevention

Patching a stoop commonly runs a few hundred dollars; replacing a set of concrete steps typically $1,500 to $5,000 depending on size, height, and whether the base needs rework. Whatever you do, protect the result: seal the concrete, keep water draining away, and go easy on the harshest de-icing salts, the same freeze-thaw discipline I lay out in protecting masonry from Wisconsin freeze-thaw. That is what buys a new stoop another few decades up here.

The safety issues that force the decision

Sometimes the repair-or-replace math is not really about the concrete at all, it is about safety, and up here where steps ice over that comes first. A stoop that has settled so the treads now slope back toward the house sheds water and snowmelt against the foundation and freezes into a hazard every cold morning; that pitch problem usually means replacement, because you cannot re-level settled steps by patching. Risers that have become uneven as the stoop shifted are a genuine trip hazard, and inconsistent riser heights are one of the most common causes of falls on stairs. Missing or wobbly railings are their own issue, and any set of steps serving a door needs a graspable rail once you are past a couple of risers. And spalling that has worn the tread edges round removes the crisp nosing your foot expects. When I walk a client through this, safety trumps cost: a stoop that is merely ugly can wait, but one that pitches wrong, has uneven risers, or lacks a sound rail should move to the top of the list regardless of what the surface looks like.

Frequently asked questions

Should I repair or replace my concrete steps? Repair if the damage is surface-level, spalling, chips, small stable cracks, and the structure is sound. Replace if the steps are tilting, settling, crumbling in large sections, or have become a trip hazard. Structural movement means replacement; cosmetic wear can be patched.

Why do concrete stoops crumble in cold climates? Freeze-thaw cycling. Water gets into the concrete, freezes, expands, and breaks it apart from the inside, and de-icing salt accelerates both the cycling and chemical attack. Horizontal surfaces like steps hold water, so they suffer the most.

Can spalled concrete steps be resurfaced? Yes, if the structure is sound. Surface spalling can be repaired with a bonding agent and a freeze-thaw-rated repair mortar or resurfacer. The key is proper prep, cleaning and bonding, otherwise the patch pops off. Structural damage cannot be resurfaced away and needs replacement. If the ground under the steps is what moved, resurfacing only buys a season — an Austin concrete driveway contractor working expansive clay checks the base before quoting any patch.

Those White Stains on Brick: What They Mean and How to Fix Them

The chalky white bloom on brickwork gets treated as a stain, something to scrub off and forget. It is better understood as a receipt. Salt does not appear on a wall by itself; it arrives dissolved in water that came from somewhere, moved through the masonry, and evaporated at the face. The deposit is the record of that trip.

The white is salt the wall carried out

Soluble salts exist in most masonry materials, in the units, in the mortar, and in the ground below. When water passes through the wall it dissolves them and carries them along. At the surface the water evaporates and the salt is left behind as a crystalline deposit. Three ingredients are required and all three must be present: a source of salt, water to mobilise it, and a path to the surface. Removing any one of them ends the problem, and only one of them is usually practical to remove.

New-construction bloom versus a symptom

Not every occurrence means something is wrong. New masonry contains construction water and it has to leave, so a bloom appearing in the first months on new brickwork is common, usually self-limiting, and often gone after a season or two of weathering. What is not normal is the same deposit returning year after year on an established wall, or appearing on one specific area, or reappearing weeks after cleaning. That pattern is a wall with an ongoing water supply, and the deposit is pointing at it.

Removing it without making it worse

Start dry. A stiff bristle brush on a dry wall removes a surprising amount, and dry removal avoids redissolving the salt and driving it back in. What is left often responds to water and a brush, worked in small areas and rinsed. Proprietary efflorescence removers exist for stubborn deposits and should be tested on an inconspicuous patch first. Acid is the risky option: it can etch the brick face, damage lime mortar, and sometimes causes a worse secondary bloom, so it belongs last on the list rather than first. Whatever the method, do not clean a wall that is currently wet.

Finding the water, which is the actual job

Look above the deposit before looking at it. The usual sources are a leaking or overflowing gutter, a downspout discharging against the wall, failed or missing flashing at a sill, parapet, or roof junction, a defective coping letting water into the top of the wall, sprinklers or irrigation overspray hitting the masonry, and rising damp where a wall wicks moisture from the ground. The location of the bloom is informative: a horizontal band suggests a specific entry point above it, while a general low-level appearance across an elevation suggests ground moisture. Timing helps too. A deposit that appears after every heavy rain and fades between them points at a defect that only leaks under driving conditions, whereas one that persists through dry spells is being fed continuously, which narrows it to irrigation, a plumbing leak, or ground water.

The related problem you do not want

Sometimes the salt crystallises inside the pore structure rather than at the surface, and that version is a different order of concern. The crystals grow within the brick and exert pressure from inside, which spalls the face off in flakes. It shows up as crumbling and loss of the fired skin rather than as a white deposit. The response is the same, find and stop the water, but the damage already done is permanent and the affected units eventually need replacing.

Frequently asked questions

Is efflorescence structurally serious? The deposit itself is harmless. What it indicates, water moving through the wall, can lead to serious problems including freeze-thaw damage and internal salt crystallisation, so it is a symptom worth acting on rather than an emergency in itself.

Will sealing the wall stop it? Usually not, and it can make things worse. A surface sealer does not remove the water, and a film-forming product traps moisture behind it, which pushes the crystallisation inward where it does real damage.

Why does it keep coming back after cleaning? Because cleaning removes the salt but not the water supply. Recurring deposits mean finding and fixing the source, whether that is flashing, gutters, irrigation, or rising damp, rather than scrubbing again. Freestanding hardscape shows the same pattern, and on those walls the culprit is often man-made rather than meteorological, which is why a San Diego hardscaping crew checks sprinkler throw before anything else.

A Homeowner’s Guide to CMU Block Construction

Concrete block gets treated as the plain option, the thing you use where nobody will see it. That reputation comes from how it looks rather than how it performs. A block wall is one of the few residential assemblies that can be tuned after the units are on site, and understanding how it gets its strength explains most of what a homeowner needs to decide.

A block is a shape, and the shape is the point

A standard unit is nominally eight by eight by sixteen inches including the mortar joint, and it is hollow. Those voids, called cells, are not there to save material. They are a continuous vertical channel through the wall, and what goes into them determines what the wall can do. Left empty, the wall is a stack of units held together by mortar and good only in compression. Filled with grout around vertical steel, the same wall becomes a reinforced element that resists bending and lateral pressure. Two walls built from identical units can differ by an order of magnitude in capacity.

Grout and steel turn a stack into a wall

Reinforcement comes in two directions. Vertical bars sit in the cells and are grouted solid, tying the wall down into the footing so it cannot rotate or slide. Horizontal reinforcement, either wire laid in the bed joints or bars in special bond-beam units, ties the length of the wall together and controls cracking. Where the steel goes, how far apart, and which cells get grouted are design decisions, not site decisions. This is exactly what an engineer specifies on a basement or retaining wall, and it is the part most commonly omitted when a wall is built without a design.

Where block outperforms everything else

It is dimensionally consistent and fast to lay, which makes it economical for anything long or tall. It is non-combustible, and assemblies achieve good fire ratings without additional treatment. It has substantial thermal mass, which flattens out daily temperature swings inside. It is not attractive to insects and does not rot. And because the cells are accessible until the grout goes in, services and reinforcement can be run inside the wall itself.

The two places block struggles

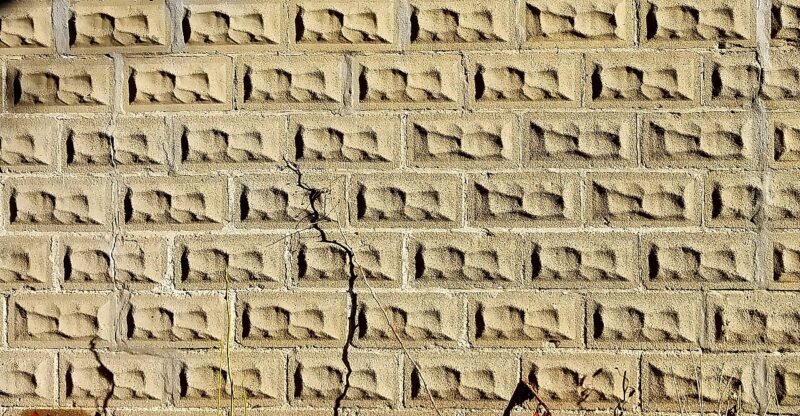
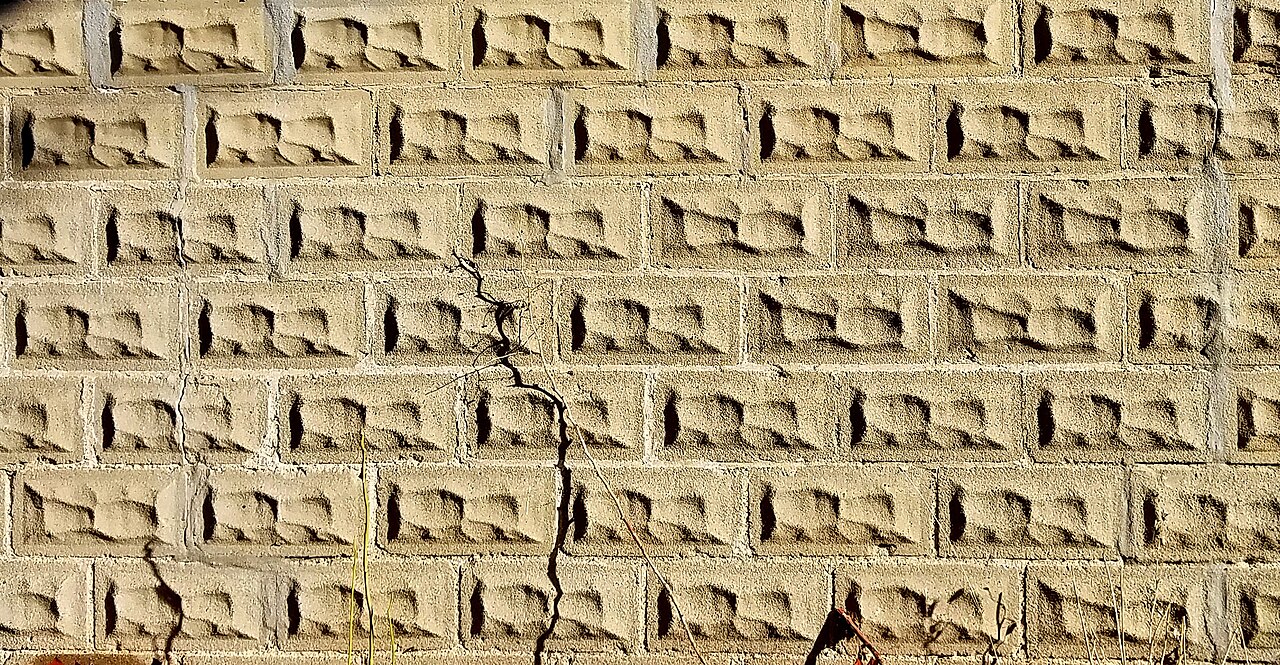
Thermal performance is the first. Mass is not insulation, and a bare block wall has a poor R-value, so any conditioned space needs continuous insulation added rather than relying on the mass. Insulating the cells alone leaves the webs as thermal bridges and delivers less than people expect. Appearance is the second, and it is why block usually ends up behind a veneer, a render, or below grade. Where a block wall is left exposed, the alternatives are architectural units with a split or ground face, which change the cost basis of the job entirely.

Reading an existing block wall from outside

You can learn a fair amount without opening anything up. Look along the wall for bowing in the middle third of its height, which suggests lateral pressure and inadequate reinforcement. Look for horizontal cracking near the middle, which in a basement wall is a warning sign rather than a cosmetic one, and for stair-step cracking through the joints at corners, which points to differential settlement. Look for a bond beam course near the top, for weeps at the base of anything retaining soil, and for evidence that the drainage has an outlet. A wall with no visible drainage provision and soil behind it is holding water every time it rains.

Frequently asked questions

Do all the cells need filling? No, and filling all of them is usually unnecessary expense. A design specifies which cells are grouted, typically those containing reinforcement plus cells at corners and openings. Grouting is about engaging the steel, not about making the wall solid.

Is block stronger than poured concrete? Poured concrete has higher compressive strength as a material, but a properly reinforced and grouted block wall performs comparably in residential applications. The decision is more often about access, speed, and cost than about raw capacity.

Can a block wall be insulated from inside? It can, and in a basement it commonly is, but the detail matters: an interior assembly that traps moisture against the block causes problems. Continuous rigid insulation with attention to vapour behaviour works better than framing tight to a damp wall.

CMU and Block Foundations in Coastal Jacksonville

Drive through Avondale and you’ll see a lot of homes sitting on concrete block, and there’s a good reason for it. Living this close to the St. Johns River and the coast, the two things that eat houses here are moisture and termites — and concrete masonry units, or CMU, shrug off both better than wood framing does. I spent an afternoon with a homeowner near Boone Park who’d been scared off block by a rough inspection report, and once we walked the crawlspace it was clear the block wasn’t the problem. The way it had been detailed for a coastal site was.

CMU and Block Foundations in Coastal Jacksonville
Photo: Daderot · CC0

Why block makes sense on the coast

CMU foundations and stem walls are the norm across coastal Jacksonville for practical reasons. Concrete doesn’t rot, termites can’t eat it, and a properly grouted, reinforced block wall handles the lateral loads that come with our high water table and the occasional storm surge. In a flood-prone zone, a masonry stem wall that lifts the living floor above base flood elevation is often exactly what the Florida Building Code wants to see.

The detail that decides everything: the rebar

Here’s what most people miss. A block foundation on the coast lives or dies by how its steel is protected. Salt air drives chloride into concrete, and chloride corrodes reinforcing steel. When rebar rusts it swells, and that expansion cracks the block from the inside — the same way freeze-thaw wrecks brick up north, except our version runs year-round. Good coastal detailing means:

  • Full grouting of the reinforced cells, not partial, so the steel is fully encased.
  • Adequate cover — enough concrete between the steel and the outside face.
  • Sealed, drained below-grade faces so standing water isn’t sitting against the block.

The National Concrete Masonry Association’s technical guidance on reinforced concrete masonry is the standard this work is built to, and it’s worth understanding before you accept a bid.

This is also why I steer people away from the cheapest foundation number. Coastal detailing is invisible once the wall is up, so it’s the easiest place to cut. I tell homeowners to have a Jacksonville masonry company put the grout, rebar size, and spacing in writing, and to keep those specs with the house records. If you want the fundamentals first, here’s a plain-English guide to concrete block construction.

Moisture is the slow killer

Even with the steel handled, humidity is relentless here. Block is porous, and a wall that stays damp grows efflorescence — the white powder you see leaching out — and eventually mold on interior finishes. Coastal foundations need a capillary break, exterior dampproofing below grade, and real drainage: gutters that carry water away, grade that slopes off the house, and no planting beds trapping moisture against the wall. Sandy soil drains fast, which helps, but a high water table can undo that in the rainy season.

What it costs

A new CMU foundation or stem wall in the Jacksonville area generally runs $12 to $25 per square foot of wall, with reinforced, fully grouted coastal walls at the upper end. Repairs vary widely: sealing and drainage corrections might be $2,000 to $6,000, while addressing corroded rebar and cracked block can climb past $10,000 once you’re rebuilding sections. As always, the cheap number usually skips the coastal detailing that makes the wall last.

Termites, moisture, and the coastal reality

Two coastal Jacksonville realities make block a sensible foundation choice, and both are worth understanding. First, concrete block does not feed termites the way wood framing does, a real advantage in a subtropical climate where termite pressure is relentless year-round, though the framing that sits on the block still needs protection. Second, the same porosity that lets block wick moisture means a coastal block foundation lives or dies by its coatings and drainage: a proper waterproof coating on the exterior below grade, flashing where the wall meets the framing, and grading that carries our heavy summer rain away from the base. Get those right and a block foundation shrugs off the humidity, salt air, and storm water that define building here. Skip them and the block will pull moisture straight through, so treat the waterproofing as part of the structure, not an afterthought.

Frequently asked questions

Is concrete block a good foundation for coastal Florida? Yes. CMU resists rot, termites, and moisture better than wood, and a reinforced, grouted block stem wall suits flood-prone coastal sites. The catch is that the reinforcing steel must be properly grouted and protected from salt-driven corrosion.

What makes coastal block foundations fail? Usually corroded rebar. Salt air drives chloride into the concrete, the steel rusts and swells, and the block cracks from within. Poor drainage and trapped moisture accelerate it.

How much does a CMU foundation cost in Jacksonville? Roughly $12 to $25 per square foot of wall for new work, with fully grouted coastal-rated walls at the top of that range. Moisture and drainage repairs often run $2,000 to $6,000; structural rebar repairs can exceed $10,000.

Masonry Foundation Repair on Georgia Red Clay

Last spring a homeowner off Marietta’s Whitlock Avenue walked me around back to show me a stepped crack climbing the corner of her brick ranch, right where the patio met the foundation. She’d called me about the patio. What she actually had was a soil problem, and the patio was just the part she could see.

Masonry Foundation Repair on Georgia Red Clay
Photo: Grogan, Brian · PDM

I build patios, stone veneer, and retaining walls for a living, so I’m not the guy who underpins a house. But around the Atlanta metro I end up diagnosing foundation trouble almost every week, because the same Georgia red clay that cracks foundations also heaves my hardscapes. If you own a masonry home on this soil, it pays to understand what you’re up against.

Why Georgia red clay is so hard on masonry

The red clay under Marietta, Kennesaw, and most of Cobb County is expansive. It swells when it soaks up our summer downpours and shrinks tight through a dry stretch in August. That shrink-swell cycle lifts and drops everything sitting on it: footings, slabs, brick piers, and yes, my patios. Over a few seasons the movement opens stepped cracks in mortar joints, tips veneer away from the framing, and pulls stoops loose from the wall.

Our humidity piles on. Brick and block stay damp longer here than in a dry climate, so water wicks through the wall and leaves white efflorescence and green biological staining. We also get just enough winter freeze-thaw to pop the face off already-saturated brick. None of that is the root cause, but it tells you the wall is holding water it shouldn’t.

Telling a structural crack from a cosmetic one

Not every crack means a failing foundation. Hairline cracks in a mortar joint, or a thin vertical line where an addition meets the original house, are usually cosmetic. I start worrying when I see stepped cracks wider than about a quarter inch, brick that’s bowing or shearing along a joint, doors and windows that suddenly stick, or a gap opening between the foundation and my hardscape. If you want to walk through the difference before you panic, I put together a plain-language guide on telling structural cracks from cosmetic ones.

How the repair actually works

On expansive clay, the real fix is almost always two jobs: stabilize the foundation and control the water that’s driving the clay’s movement. For the structural side, a crew will typically drive steel push piers or helical piers down past the active clay to stable soil, then lift and lock the footing. The National Concrete Masonry Association publishes design and durability guidance for concrete masonry foundation walls, and it’s worth understanding how a wall is supposed to be built before you sign off on repairing one. If the cracking is structural, that’s when I bring in an Atlanta masonry company that handles piering and wall rebuilds, because that work needs an engineer’s numbers behind it, not a hardscaper’s eye.

My half of the problem is drainage, and honestly it’s the half most people skip. I regrade so the soil falls at least six inches over the first ten feet away from the wall, extend downspouts well past the foundation, and where the lot traps water I add a French drain tied out to daylight. Keeping the clay at a steady moisture level does more to stop the next crack than any single pier.

What foundation repair costs around Marietta

A single push pier commonly runs $1,200 to $2,500 installed, and most homes that need piering need several, so a typical stabilization project lands somewhere between $8,000 and $25,000. Injecting or repointing a cracked mortar joint is far cheaper, often $500 to $1,500. Drainage corrections such as regrading, downspout extensions, and a French drain usually run $1,500 to $6,000 depending on how much dirt we move. These are defensible ballparks, not quotes; the soil report and the depth to stable ground swing the number more than anything else.

Frequently asked questions

Does red clay always mean I’ll get foundation problems? No. Plenty of Marietta homes sit for decades without trouble. Problems show up when water is allowed to swing the clay’s moisture up and down right at the foundation, usually from bad grading, clogged gutters, or a downspout dumping at the corner. Manage the water and you manage most of the risk.

Can I just patch the crack myself? You can seal a cosmetic hairline crack with a flexible masonry sealant, and that’s fine. But sealing a crack that’s still moving only hides it. If the crack is growing, stepped, or wider than a quarter inch, get it looked at before you cover it up.

How long does the repair take? Most pier-and-lift jobs on a typical home take two to four days, with drainage work adding another day or two. The bigger delay is usually the engineering and permitting up front, which can add a couple of weeks before anyone breaks ground.