Category: Patios & Pavers

Permeable Pavers: Pros, Cons and Real Costs

Every few years a product comes along that is oversold, and permeable pavers went through that phase. Homeowners heard “eco-friendly” and assumed it was magic. It is not magic, but it is genuinely useful in the right spot, and out here in the desert, where our rain arrives all at once during monsoon season, letting water soak into the ground instead of sheeting off is more than a green talking point. Here is the honest version, costs and drawbacks included.
Permeable Pavers: Pros, Cons and Real Costs
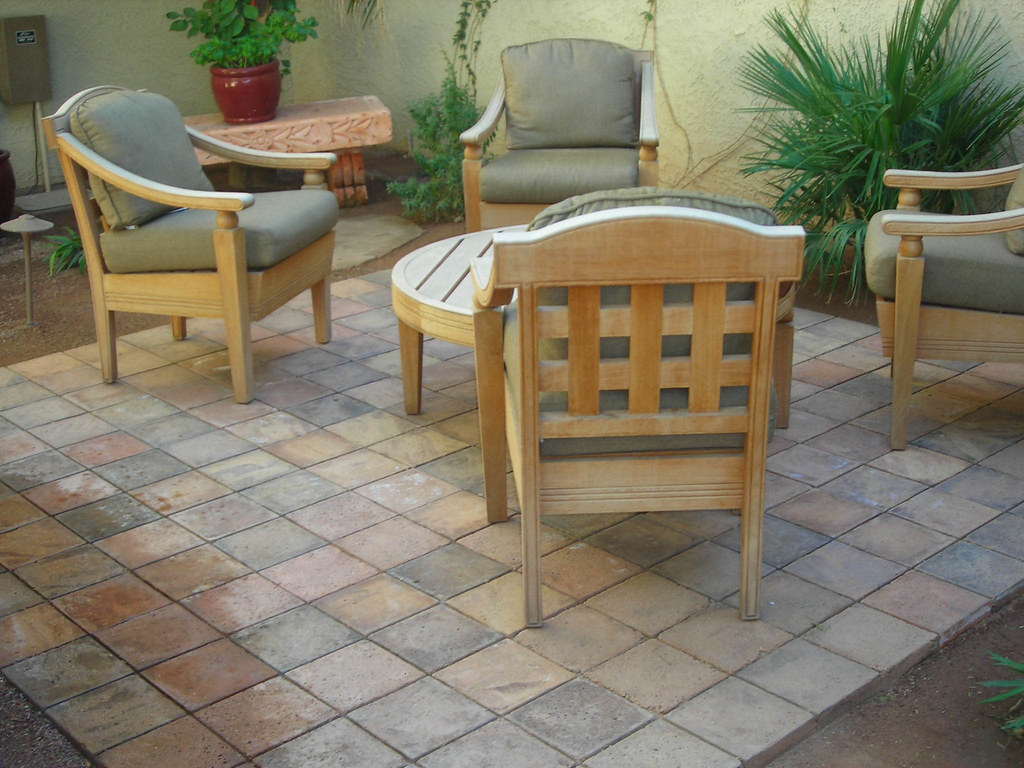
Photo: Arto Brick · BY 2.0

How permeable pavers work

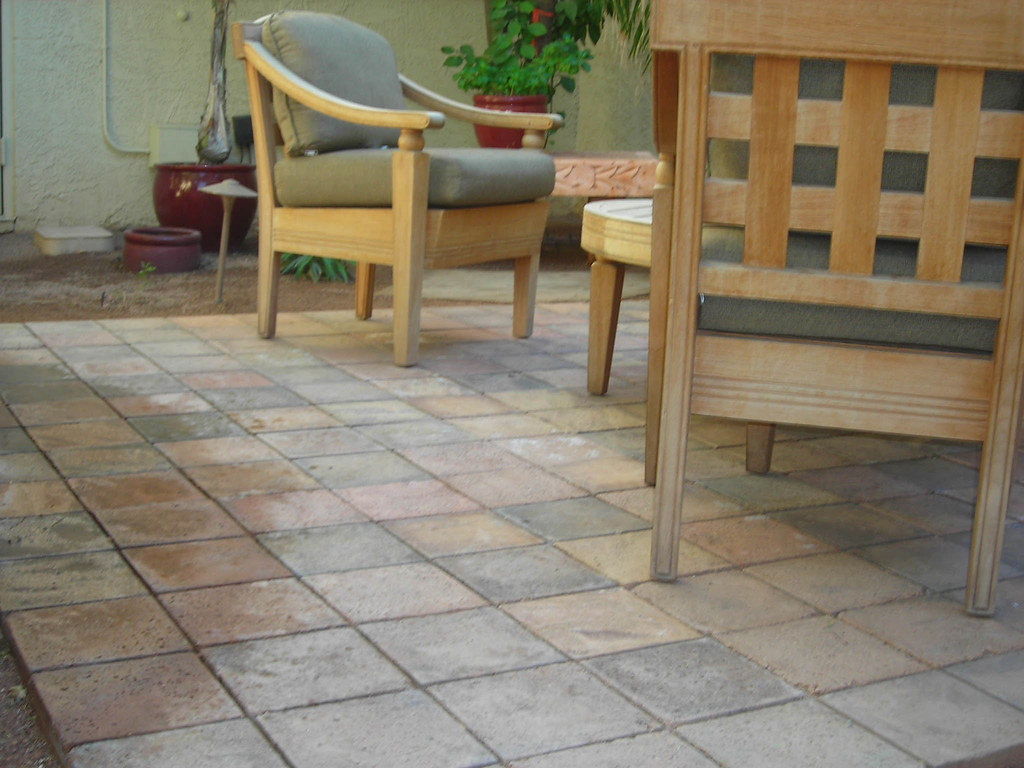
Regular pavers sit on compacted stone and sand and shed water off the surface. Permeable pavers are set with wider joints filled with small open-graded stone, over a deep bed of open crushed rock, so water drains straight down through the joints and into a stone reservoir below, then into the ground. The system manages stormwater on site instead of dumping it into the street or a drain. The EPA promotes permeable pavement as green stormwater infrastructure at the EPA.

The real advantages

  • Stormwater control. Reduces runoff and puddling, which matters in intense-rain climates and on lots that flood.
  • Recharges groundwater instead of sending rain to the storm drain.
  • Can satisfy local drainage or impervious-surface rules, which increasingly limit how much hard surface a lot can have.
  • No standing water, so less ice risk in cold climates and less mosquito breeding in wet ones.

The drawbacks nobody mentions upfront

  • Higher cost. The deep open-graded base and special joint stone cost more than a standard patio, commonly $15 to $30 per square foot installed versus roughly $10 to $20 for conventional pavers.
  • Maintenance is different. The joints can clog with fines and organic debris over time and need periodic vacuuming or cleaning to keep draining. Neglect that and permeability drops.
  • Not for every soil. If the underlying soil drains poorly, the system needs extra design or it just holds water.
  • Base is critical. Done wrong, it fails like any paver job, the base issues I cover in fixing a sunken or uneven paver patio.

When it’s worth it

Permeable pavers earn their premium when you have a real drainage problem, a lot that puddles, a jurisdiction with runoff limits, or a desire to keep monsoon rain on your property, and when the soil below can actually accept water. For a plain patio on well-draining ground with no runoff concern, standard pavers are cheaper and simpler. Match the system to the problem. If you do install them, commit to keeping the joints clean, because a clogged permeable patio is just an expensive regular one.

Test your soil before you commit

The single factor that decides whether permeable pavers are worth it is one most sales pitches skip: how well the soil underneath drains. The whole system relies on water passing through the joints, into a stone reservoir, and then into the ground. If the native soil is heavy clay that barely accepts water, that reservoir just fills and stays full, and you have paid a premium for a patio that puddles from below. There is a cheap test I always run first: dig a hole about a foot deep where the patio will go, fill it with water, let it drain, fill it again, and time how fast the second fill drops. Fast drainage, an inch or more an hour, and permeable pavers will work well. Slow or nil, and you either need an engineered underdrain to carry water away, which adds cost, or you should reconsider the whole approach. In sandy desert or coastal soil, permeable systems usually thrive; in dense clay, they need extra design or they disappoint. Test the ground before you spend on the pavers, not after.

Frequently asked questions

Are permeable pavers worth the extra cost? They are when you have a genuine drainage need, a lot that puddles, local runoff or impervious-surface limits, or a goal of recharging groundwater, and soil that can accept water. For an ordinary patio on well-draining ground, standard pavers cost less and do the job. Match the system to the problem.

Do permeable pavers require special maintenance? Yes. The open joints that let water through can clog with fines and debris over time, so they need periodic cleaning or vacuuming to keep draining. A neglected, clogged permeable system loses its main benefit and behaves like a standard, more expensive patio.

How much more do permeable pavers cost? Commonly $15 to $30 per square foot installed, versus roughly $10 to $20 for conventional pavers. The premium comes from the deeper open-graded base and the special joint stone that make the drainage work. On an addition the premium is easier to justify, since the drainage has to be solved anyway — a Nassau County home addition contractor can fold the open-graded base into the site work.
Re-Leveling a Sunken or Uneven Paver Patio

A patio that has gone uneven is telling you something specific, and the first job is to work out what. Relaying pavers is straightforward work. Relaying them over the same problem that moved them the first time is how a patio gets repaired twice in five years.

Find out which way it moved

Sunken and heaved look similar from a distance and have opposite causes. A dished area that holds water after rain means material was lost from beneath: the base was never compacted properly, or water washed fines out from under it, or something buried below has settled. A raised, tented area means something pushed up, usually a tree root growing under the slab or frost acting on a base with poor drainage. Standing at one end with a level, or just a straightedge and a hose test, sorts one from the other in a few minutes, and the two need different repairs.

Lifting, correcting, and resetting

The sequence itself is not complicated. Lift the affected pavers, keeping track of the pattern and setting them aside face up. Excavate the bedding layer and inspect what is underneath, which is the point of the exercise. Correct the base by adding and compacting aggregate in lifts, or by removing whatever is heaving it. Screed a consistent bedding layer, reset the units to the surrounding level, restore the edge restraint if it has shifted, then refill and compact the joint sand. A plate compactor with a protective mat settles the field without chipping the paver faces.

The base is where the answer is

Almost every uneven patio was an inadequate base rather than a paver problem. The three usual deficiencies are insufficient depth of compacted aggregate for the use, compaction done in one pass rather than in lifts, and no separation fabric between the aggregate and soft native soil, which lets the two mix over time. If the excavation shows a thin scatter of stone over topsoil, relaying the same pavers on the same base will produce the same result. Base construction and installation standards for hardscape work are set out by the Concrete Masonry and Hardscapes Association, and they are worth reading before accepting a quote that does not state a depth.

Fix the water or do it again

If a downspout or the grade delivered water under the patio once, it will do so again. Before anything gets closed up, redirect the discharge well clear, correct the surrounding slope so water runs away from the paved area, and confirm the finished surface itself drains rather than sitting flat. This is the step most commonly skipped, and it is the reason repaired patios sink a second time in the same place. It is also the cheapest part of the whole job.

When relaying is not enough

Some cases need more than a reset. A patio settling next to a foundation may be following backfill that is still consolidating, and that is worth understanding before repaving over it. Widespread rather than localised settlement, or a surface that has moved again within a year of being repaired, usually means the base needs full replacement rather than correction. And where a mature tree root is lifting the field, cutting it is a decision about the tree as much as the patio, so it deserves an arborist’s view rather than a saw.

Frequently asked questions

Can one sunken paver be fixed on its own? Yes. Lift it, top up and compact the bedding beneath, reset it flush, and refill the joints. A single low unit in an otherwise flat field is usually a local bedding issue rather than a base failure.

Is polymeric sand worth using on a repair? It resists washout and suppresses weeds better than plain sand, but it demands full joints, a clean surface, and watering exactly as the manufacturer specifies. Applied carelessly it hazes the pavers and cracks out within a season.

How do I stop it sinking again? Fix the water. Redirect downspouts, correct the grade so water flows away, and ensure the surface drains. Do that alongside a base compacted in lifts and joints kept full, and the repair holds. Where the patio meets the house, the same regrade usually improves the entry threshold as well, worth raising with a Queens kitchen remodeling contractor if that door is being reworked anyway.

Keeping a Paver Patio Looking New: Sealing and Upkeep

A paver patio is one of the few masonry surfaces homeowners can genuinely maintain themselves, and one of the few they routinely wreck by overdoing it. Down here in Mandarin, on Jacksonville’s south side, the combination of heat, humidity, and afternoon downpours means patios grow weeds and algae fast, and I get a lot of calls from people who sealed theirs and ended up with a cloudy, slippery mess. Maintenance is simple if you understand what the joints are actually doing.

Keeping a Paver Patio Looking New: Sealing and Upkeep
Photo: Arto Brick · BY 2.0

The joint sand does the real work

A paver patio is not held together by the pavers; it is held together by what is between them. Interlock comes from the sand packed in the joints, which lets the field of pavers move as a unit and share load. When that joint sand washes out, the pavers loosen, shift, and start to rock. So the single most important maintenance task is keeping the joints full, and in a rainy climate like Jacksonville’s that means checking them at least once a year.

Polymeric sand versus regular sand

Most patios today use polymeric sand, which contains a binder that hardens when wetted, locking the joints and resisting washout and weeds far better than plain sand. When joints look low, sweep in fresh polymeric sand, compact, and activate it with a light mist exactly as the product directs. The most common mistake I see is overwatering during activation, which floods the binder out onto the paver faces and leaves a haze. Follow the wetting steps precisely.

Cleaning without wrecking the surface

For routine cleaning:

  • Pull or spot-treat weeds early before roots widen the joints
  • Wash with mild soap and water or a dedicated paver cleaner for algae and grime
  • Keep pressure washers on a low, fanned setting and off the joints, high pressure blasts the sand right out

If the patio has already sunk or heaved in spots, cleaning will not fix the underlying base, and you are into the releveling work I cover in fixing a sunken or uneven paver patio.

To seal or not to seal

Sealing a paver patio is optional and, unlike vertical brick, can be appropriate here because pavers are dense and the sealer helps lock joint sand and resist stains. But a film-forming “wet look” sealer on a humid, shaded patio can trap moisture and turn slippery or cloudy. If you seal, choose a breathable penetrating product, make sure the pavers are fully dry first, which is a real challenge in Jacksonville humidity, and reapply every few years. Hardscape maintenance and joint guidance is published by the Concrete Masonry and Hardscapes Association. Expect to spend $0.50 to $2 per square foot on sealing materials if you do it yourself, more if a pro handles prep and application.

A simple seasonal routine for a humid climate

Down here the patios that stay nice are the ones with an owner who does a little and often, rather than nothing for three years and then a panic. The routine I hand my Jacksonville clients is short. In spring, before the heat and the afternoon storms set in, walk the patio and top up any low joints with fresh polymeric sand, then give the surface a gentle wash to knock back the winter’s algae. Through the summer, pull weeds the week you see them, because a Florida weed left a month has roots widening the joint. After the wettest part of the season, check the low spots for any pavers that have started to rock, an early sign the base is moving. And once every few years, if you seal, reapply the breathable repellent on a stretch of dry days. None of it is hard, and it is a fraction of what a full reset costs once the joints wash out and the field goes loose.

Frequently asked questions

Do I need to seal my paver patio? No, sealing is optional. Pavers perform fine unsealed. Sealing can help lock joint sand and resist stains, but in humid or shaded conditions a film-forming sealer can trap moisture and get slippery. If you seal, use a breathable penetrating product on fully dry pavers.

How do I keep weeds out of paver joints? Keep the joints full of polymeric sand, which resists weed growth, and pull or spot-treat any weeds early before their roots widen the joints. Weeds in pavers usually signal that joint sand has washed out and needs topping up.

Can I pressure wash a paver patio? Yes, but carefully. Use a low, fanned setting and avoid aiming directly into the joints, because high pressure blasts out the sand that holds the patio together. After any thorough wash, plan to refill and recompact the joint sand. The same restraint applies to anything wooden nearby — a Brooklyn millwork shop will tell you a pressure washer takes the surface off exterior trim long before it cleans it.

Picking Patio Pavers: Brick Versus Concrete

Clay brick pavers and concrete pavers end up in the same aisle and get compared as if they were two finishes of one product. They are two different materials made by different processes, and almost every practical difference between them, in price, in appearance, and in how they age, comes from that.

One is fired, the other is cast

A clay paver is shaped from clay and fired at high temperature until the material vitrifies. The colour comes from the clay body and the firing, so it goes all the way through and there is no surface layer to lose. A concrete paver is cast from cement, aggregate, and pigment, then cured. That process is enormously more flexible: it produces any shape, any thickness, and any colour, including convincing imitations of stone and of clay brick itself. The trade-off is that the pigment is concentrated near the surface.

What the installed price actually reflects

Concrete units are generally less expensive per square foot, and the gap widens on large areas. But the material is a minority of the installed cost on any properly built patio, because the work is in the base: excavation, a compacted aggregate depth suited to the use, screeded bedding sand, edge restraint, and jointing. That base is identical whichever unit sits on top of it. Two quotes that differ substantially for the same patio are almost never differing on the paver.

Colour is the difference that shows in year fifteen

Clay holds its colour more or less indefinitely, because there is nothing to fade to. What it does instead is weather: it darkens, it picks up biological growth in shaded damp corners, and the result is generally considered attractive. Concrete pavers hold their appearance well for a long time and then gradually soften in colour, most visibly on the surfaces that get direct sun. Higher-quality units with pigment through the mix fade far less than budget ones with colour concentrated at the face. If a patio needs to look the same in twenty years, that is the argument for clay.

Where each one suits a yard

Clay suits period houses, formal layouts, and anywhere the brickwork of the building is part of the composition; it comes in a limited palette of earth tones and a limited set of shapes, and running bond or herringbone in a rectangular unit is most of what it does. Concrete suits contemporary schemes, large areas, and anything that needs a specific shape, a permeable system, or a stone appearance at a fraction of stone cost. It also handles curves and irregular boundaries better because of the range of shapes available. There is a practical consideration on top of the aesthetic one, which is availability over time. Clay pavers in a standard size stay available for decades and a later batch will blend acceptably. Concrete ranges get discontinued and reformulated, so a repair five years on may need units that no longer exist in that colour. Where a patio is likely to be extended later, or where a section may need lifting for access to something buried, keeping a pallet of the original units somewhere dry is worth more than it costs.

The base matters more than the choice

Whichever unit is chosen, the failure modes are shared and they all live underneath. An under-excavated or poorly compacted base settles unevenly. Missing or failed edge restraint lets the field spread sideways, which opens every joint at once. Joints allowed to empty destroy the interlock that makes a paved surface behave as one plane. Water that is not directed away undermines the base from below. None of that is affected by the material on top, which is why a well-built concrete paver patio outlives a badly built clay one by decades.

Frequently asked questions

Which one is more slippery? Both are acceptable when clean; the risk comes from what grows on them. Shaded, damp areas develop algae on either material, and that is a cleaning and drainage question rather than a material one.

Can individual pavers be replaced? Yes, and that is a real advantage of any unit paving over poured concrete. A damaged unit can be lifted and swapped. Matching is easier with clay, since concrete units from a later batch may not match a faded field.

Do paver patios need sealing? It is optional. The practical benefit is stabilising joint sand and slowing weeds rather than protecting the units, and many patios do well with good joint sand and periodic cleaning instead. In a subtropical climate the joint sand washes out faster and the interval shortens, so a Miami driveway contractor treats sealing as recurring maintenance rather than an option.

Building a Patio That Survives Florida Humidity and Storms

San Marco has some of the prettiest paver patios in Jacksonville, and it also has some of the fastest failures. I toured a backyard off Hendricks Avenue last summer where a two-year-old patio had already grown a lip you could trip over — the pavers near the downspout had settled a full inch. The homeowner assumed the installer used bad pavers. The pavers were fine. The base and the drainage weren’t. In Florida, that’s almost always the real story.

Building a Patio That Survives Florida Humidity and Storms
Photo: Poliphilo · CC0

Why Florida patios fail differently

Up north, the enemy is freeze-thaw. In Jacksonville we almost never freeze, so the forces attacking a patio are different: relentless humidity, sandy soil that shifts, salt in the coastal air, and downpours that dump inches of rain in an afternoon. A patio here doesn’t heave from ice — it settles, floats, and grows weeds in the joints. Build for water and for a soft subgrade and you’ve solved most of it.

The base is the whole game

A storm-rated patio is really a drainage project with a stone surface on top. Here’s the section I’d insist on in our sandy soil:

  1. Excavate deep. Dig 8 to 12 inches below finished grade — deeper than a lot of quick installers want to.
  2. Compacted crushed-stone base. Six to eight inches of aggregate, compacted in lifts. This is what keeps the surface from settling when the sand below gets saturated.
  3. Geotextile fabric between the subgrade and the base so Florida’s sand doesn’t pump up into your stone over time.
  4. A deliberate slope of about a quarter inch per foot, pitched away from the house. This one detail prevents most standing-water and settling problems.
  5. Edge restraint and polymeric sand to lock the field in and keep weeds and washout out of the joints.

None of this is exotic, but it’s labor, and it’s where a cheap bid cuts corners. When homeowners ask me how to vet an estimate, I tell them to have a Jacksonville paver contractor spell out the base depth and slope in writing — if the quote just says “install pavers,” you don’t actually know what you’re buying. For a sense of local pricing, I broke down paver patio costs in Jacksonville separately.

Materials that shrug off salt and humidity

Concrete pavers are the workhorse here and handle our climate well. If you’re near the river or the Intracoastal, favor dense, low-absorption units and stainless or polymer-coated edge spikes — plain steel rusts fast in salt air. Clay brick, common on San Marco’s older homes, looks right historically but is softer; use it for looks, not high-traffic driveways. Whatever you pick, skip anything that traps moisture underneath, because in this humidity it never dries.

Storms, wind, and permits

Ground-level patios aren’t wind-rated structures, but anything attached — a screen enclosure, a pergola, a summer kitchen — is, and Jacksonville enforces the Florida Building Code’s wind provisions. Before you build a covered or attached structure, check with the City of Jacksonville on permits and setbacks; a flat paver patio usually doesn’t need one, but the roof over it will. And plan for water: a French drain or a dry well tied into the low corner is cheap insurance against the afternoon storms we get June through September.

What it costs

Expect roughly $14 to $28 per square foot installed for concrete pavers done right in the Jacksonville area, more for clay brick, intricate patterns, or difficult access. A proper 300-square-foot patio lands somewhere around $4,500 to $8,000. The cheap $8-a-foot bids almost always skip the base depth and the drainage — the two things that decide whether your patio is still flat in five years.

Frequently asked questions

Do I need a permit for a paver patio in Jacksonville? Usually not for a flat, ground-level patio, but attached or covered structures do, and they must meet Florida Building Code wind requirements. Check with the city before building anything with a roof.

How do I keep my patio from settling in sandy soil? A deep, well-compacted crushed-stone base with geotextile fabric and proper slope. Settling is almost always a base-and-drainage failure, not a paver failure.

Are concrete or clay pavers better for Florida? Concrete pavers handle heat, humidity, and traffic best. Clay brick suits historic homes like those in San Marco for looks, but it’s softer and better kept to low-traffic areas.

Paver Patio Costs in Jacksonville (2026)

Riverside is full of those 1920s bungalows with the deep porches, and a lot of them have a backyard that turns into a swamp for twenty minutes every afternoon in July. That’s where I get most of my Jacksonville patio calls. One I remember: a homeowner off Park Street had paid for a paver patio two years earlier, and after a tropical storm rolled through, half of it had sunk into a shallow bathtub of standing water. The pavers themselves were fine. The base underneath them never stood a chance. I’ve been laying masonry and hardscape for over thirty years, and in Florida the whole game is the base and the drainage, not the pretty part on top.

Paver Patio Costs in Jacksonville (2026)
Photo: Anonymous Unknown author · PDM

What a paver patio costs in Jacksonville

For 2026, I tell Jacksonville homeowners to budget $14 to $28 per square foot installed for a standard concrete paver patio done properly. A typical 300-square-foot patio lands somewhere around $4,200 to $8,400. Go with premium pavers, lots of curves and cuts, a seat wall, or a fire feature, and you can push $30 to $50 per square foot. These are estimates. Your soil, your access, and your drainage needs move the number more than the paver you pick off the display.

What drives the price here

  • The base. Our sandy soil doesn’t hold like clay. A patio that lasts needs a properly compacted crushed-stone base, usually 4 to 6 inches, and more where the ground is soft. Skimp here and it sinks, exactly like the Park Street job.
  • Drainage and slope. With our downpours, the patio has to shed water away from the house. That means grading, and sometimes a drain or a permeable design.
  • Access. Jacksonville lots vary a lot. A wheelbarrow path through a narrow side yard adds labor fast.
  • The pavers. Basic concrete pavers are cheap; clay brick, large-format, and porcelain cost more.

Because so much Florida patio failure comes down to water and heat, I’d read up on building a patio that survives Florida humidity and storms before you commit to a design. If you’d rather hand the whole thing off, a crew that does proper Jacksonville masonry will spec the base and the slope for you and put it in writing.

Building for sand, storms, and salt

Florida doesn’t freeze, so we skip the freeze-thaw headaches my northern jobs deal with. But we trade them for other problems. Sandy soil shifts and washes. Tropical storms dump inches of rain in an hour. Our humidity feeds algae and mildew, so a shaded patio needs a joint sand and a surface that won’t turn into a slip hazard. And near the water, salt air corrodes anything metal, so edge-restraint spikes and hardware should be corrosion-resistant.

The good news about pavers in this climate is that they’re a flexible system. Unlike a poured slab that cracks when the ground moves, individual pavers ride small movements and can be lifted and reset if a section settles. That’s a real advantage in sandy Jacksonville soil, where a rigid slab often ends up with a crack running right through it. The catch is that “flexible” only works over a base that was built and compacted right in the first place. I also like polymeric joint sand here; it locks the pavers together and slows the weeds and ants that love our sandy gaps.

Permits, drainage, and doing it by the book

A ground-level paver patio often doesn’t require a building permit, but drainage rules, impervious-surface limits, and setbacks vary, and covered or attached structures are a different story. Check current requirements with the City of Jacksonville before you dig; it’s cheaper than tearing out work that violates a setback. In the historic parts of Riverside and Springfield, there can be extra review too.

Frequently asked questions

How much does a paver patio cost in Jacksonville? Most standard concrete paver patios run $14 to $28 per square foot installed, so a 300-square-foot patio typically lands around $4,200 to $8,400, with premium materials and features pushing it higher.

Do pavers hold up in Florida’s climate? Yes, because Florida doesn’t freeze, pavers avoid freeze-thaw damage, and their flexible design handles our shifting sandy soil better than a poured slab as long as the base is compacted correctly.

Do I need a permit for a paver patio in Jacksonville? A simple ground-level patio often doesn’t, but drainage, impervious-surface, and setback rules can apply, and historic-district properties may need extra review, so confirm with the city before starting.