Cracked Concrete Steps and Stoops: Repair or Replace?

Up in Menasha and around the Fox Valley, I have rebuilt more front steps than I could count, and the reason is always the same: Wisconsin winters are murder on concrete stoops. Water gets in, freezes, expands, and over enough winters it turns a solid step into a crumbling, tilting hazard. The question every homeowner asks is whether to patch it or tear it out, and there is a real line between the two. Cross it and patching is throwing good money after bad.

Cracked Concrete Steps and Stoops: Repair or Replace?
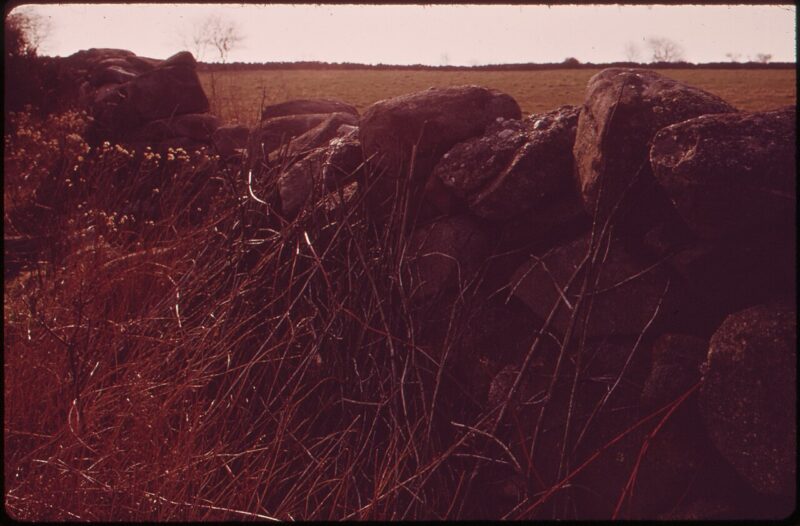
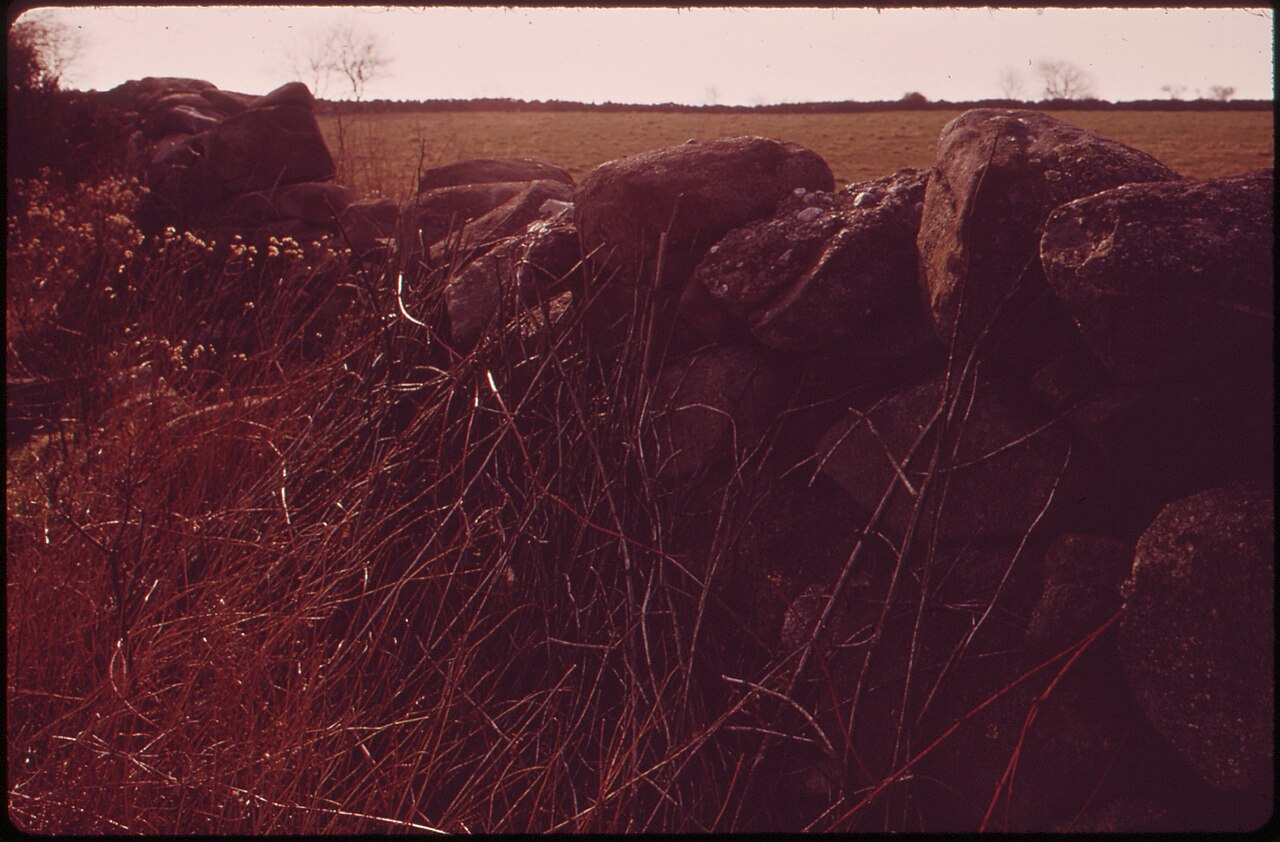
Photo: U.S. Navy photo by Mass Communication Specialist 1st Class Michael B.W. Watkins · PDM

What freeze-thaw does to a stoop

Concrete steps take the worst of everything: they are horizontal so they hold water, they get hit with snow and de-icing salt all winter, and up here they go through dozens of freeze-thaw cycles a year. Water seeps into small cracks and pores, freezes, expands about nine percent, and levers the concrete apart from the inside. Add salt, which drives more freeze-thaw cycles and attacks the concrete chemically, and a stoop that looked fine five years ago starts spalling, cracking, and pulling away from the house.

When a repair is worth it

Repair makes sense when the damage is surface-level and the structure underneath is sound:

  • Spalled or chipped surfaces and edges, patchable with the right bonding repair mortar
  • Small cracks that are not moving
  • A single worn tread on an otherwise solid stair

Done properly, with a real bonding agent and a repair mix rated for freeze-thaw, these patches hold. Done with a smear of bagged concrete on a dirty surface, they pop off by spring.

When replacement is the honest call

Tear it out when the problems are structural:

  • The stoop is tilting, settling, or pulling away from the house (a foundation or base problem)
  • Large sections are crumbling or the reinforcement is exposed and rusting
  • Cracks are wide, growing, or run all the way through
  • The steps have become a trip or fall hazard, this is a safety issue, not a cosmetic one

Steps are an egress and safety element, and building codes set requirements for riser height, tread depth, and railings; those standards are coordinated through the International Code Council and enforced by your local building department. A replacement is the chance to get those right if the old ones were not.

Cost and prevention

Patching a stoop commonly runs a few hundred dollars; replacing a set of concrete steps typically $1,500 to $5,000 depending on size, height, and whether the base needs rework. Whatever you do, protect the result: seal the concrete, keep water draining away, and go easy on the harshest de-icing salts, the same freeze-thaw discipline I lay out in protecting masonry from Wisconsin freeze-thaw. That is what buys a new stoop another few decades up here.

The safety issues that force the decision

Sometimes the repair-or-replace math is not really about the concrete at all, it is about safety, and up here where steps ice over that comes first. A stoop that has settled so the treads now slope back toward the house sheds water and snowmelt against the foundation and freezes into a hazard every cold morning; that pitch problem usually means replacement, because you cannot re-level settled steps by patching. Risers that have become uneven as the stoop shifted are a genuine trip hazard, and inconsistent riser heights are one of the most common causes of falls on stairs. Missing or wobbly railings are their own issue, and any set of steps serving a door needs a graspable rail once you are past a couple of risers. And spalling that has worn the tread edges round removes the crisp nosing your foot expects. When I walk a client through this, safety trumps cost: a stoop that is merely ugly can wait, but one that pitches wrong, has uneven risers, or lacks a sound rail should move to the top of the list regardless of what the surface looks like.

Frequently asked questions

Should I repair or replace my concrete steps? Repair if the damage is surface-level, spalling, chips, small stable cracks, and the structure is sound. Replace if the steps are tilting, settling, crumbling in large sections, or have become a trip hazard. Structural movement means replacement; cosmetic wear can be patched.

Why do concrete stoops crumble in cold climates? Freeze-thaw cycling. Water gets into the concrete, freezes, expands, and breaks it apart from the inside, and de-icing salt accelerates both the cycling and chemical attack. Horizontal surfaces like steps hold water, so they suffer the most.

Can spalled concrete steps be resurfaced? Yes, if the structure is sound. Surface spalling can be repaired with a bonding agent and a freeze-thaw-rated repair mortar or resurfacer. The key is proper prep, cleaning and bonding, otherwise the patch pops off. Structural damage cannot be resurfaced away and needs replacement. If the ground under the steps is what moved, resurfacing only buys a season — an Austin concrete driveway contractor working expansive clay checks the base before quoting any patch.
Small Garden and Seat Walls That Transform a Yard

Low masonry walls do a disproportionate amount of work in a garden. They give a flat lawn structure, they turn an undefined patio into a room with edges, and they solve grade changes that would otherwise need steps. They are also the projects most likely to be built casually, on the reasoning that something two feet high cannot go far wrong.

A seat wall has a job a garden wall does not

A garden wall defines an edge or holds a bed. Its height is whatever suits the planting. A seat wall is furniture, and that constrains it: roughly eighteen inches to the top of the cap, a cap wide enough to sit on comfortably and with a smooth edge, and a run long enough to be useful rather than ornamental. Building a garden wall and then deciding it will double as seating usually produces something at the wrong height with an uncomfortable edge, which is why the intended use belongs in the first sketch rather than the last.

Small does not mean skip the base

Every failure mode of a big wall applies to a small one, just slower. It still needs a compacted aggregate leveling pad below finished grade, so the bottom course is buried and cannot kick out. If it retains soil at all, it still needs drainage behind the face and somewhere for that water to go. And in a climate with hard winters the base still has to sit below the depth that frost reaches, or the wall will lift and settle each year until the courses no longer line up. The reason low walls fail is not that they were undersized, it is that being low made the base feel optional.

Materials and how they age

Segmental block is the practical default: consistent, fast to lay, forgiving on curves, and available with caps designed for the purpose. Natural stone costs more and looks better as it weathers, particularly against an older house. Brick suits a property that already has it, provided the mortar is matched. Poured concrete with a formed face suits contemporary schemes and takes an integral seat detail well. The cap is the element that decides how the wall reads: a generous overhang casts a shadow line, sheds water clear of the face, and is what your hand touches, so it is the wrong place to economise.

What it costs per foot

A low garden or seat wall commonly runs somewhere between forty and a hundred dollars per linear foot installed, moving with material, height, and whether it retains soil. Segmental block sits at the lower end, natural stone with a custom cap at the upper. Retaining walls cost more than purely decorative ones because of the excavation, base, and drainage behind them. Detailing and design guidance for segmental and hardscape wall systems comes from the Concrete Masonry and Hardscapes Association, which is also where the base and drainage requirements for the retaining versions are set out.

The details that make it feel finished

The difference between a wall that looks built-in and one that looks placed is usually in three details. Ends need resolving: a wall that stops abruptly reads as unfinished, while a return, a pier, or a taper into the grade reads as designed. Low-voltage lighting under the cap turns a seat wall into something usable after dark and takes very little effort while the wall is open. And planting tight to the base, rather than leaving a strip of mulch, settles the wall into the garden within a season or two.

Frequently asked questions

How high should a seat wall be? Around eighteen inches to the top of the cap, which is close to chair height. Much lower is uncomfortable to rise from and much higher stops reading as seating.

Does a low wall need a permit? A purely decorative wall usually does not, and a retaining wall under the local height threshold often does not either. Slope above the wall, a driveway behind it, or terracing can change that answer regardless of height.

What does a garden or seat wall cost? Commonly forty to a hundred dollars per linear foot installed, depending on material and height, with segmental block lowest and natural stone with a custom cap highest. Retaining versions cost more because of base and drainage work. Where the wall is part of fixing how water reaches the house, the two get priced together, which is how an Atlanta basement renovation contractor usually quotes a regrade with a seat wall on top of it.

Re-Leveling a Sunken or Uneven Paver Patio

A patio that has gone uneven is telling you something specific, and the first job is to work out what. Relaying pavers is straightforward work. Relaying them over the same problem that moved them the first time is how a patio gets repaired twice in five years.

Find out which way it moved

Sunken and heaved look similar from a distance and have opposite causes. A dished area that holds water after rain means material was lost from beneath: the base was never compacted properly, or water washed fines out from under it, or something buried below has settled. A raised, tented area means something pushed up, usually a tree root growing under the slab or frost acting on a base with poor drainage. Standing at one end with a level, or just a straightedge and a hose test, sorts one from the other in a few minutes, and the two need different repairs.

Lifting, correcting, and resetting

The sequence itself is not complicated. Lift the affected pavers, keeping track of the pattern and setting them aside face up. Excavate the bedding layer and inspect what is underneath, which is the point of the exercise. Correct the base by adding and compacting aggregate in lifts, or by removing whatever is heaving it. Screed a consistent bedding layer, reset the units to the surrounding level, restore the edge restraint if it has shifted, then refill and compact the joint sand. A plate compactor with a protective mat settles the field without chipping the paver faces.

The base is where the answer is

Almost every uneven patio was an inadequate base rather than a paver problem. The three usual deficiencies are insufficient depth of compacted aggregate for the use, compaction done in one pass rather than in lifts, and no separation fabric between the aggregate and soft native soil, which lets the two mix over time. If the excavation shows a thin scatter of stone over topsoil, relaying the same pavers on the same base will produce the same result. Base construction and installation standards for hardscape work are set out by the Concrete Masonry and Hardscapes Association, and they are worth reading before accepting a quote that does not state a depth.

Fix the water or do it again

If a downspout or the grade delivered water under the patio once, it will do so again. Before anything gets closed up, redirect the discharge well clear, correct the surrounding slope so water runs away from the paved area, and confirm the finished surface itself drains rather than sitting flat. This is the step most commonly skipped, and it is the reason repaired patios sink a second time in the same place. It is also the cheapest part of the whole job.

When relaying is not enough

Some cases need more than a reset. A patio settling next to a foundation may be following backfill that is still consolidating, and that is worth understanding before repaving over it. Widespread rather than localised settlement, or a surface that has moved again within a year of being repaired, usually means the base needs full replacement rather than correction. And where a mature tree root is lifting the field, cutting it is a decision about the tree as much as the patio, so it deserves an arborist’s view rather than a saw.

Frequently asked questions

Can one sunken paver be fixed on its own? Yes. Lift it, top up and compact the bedding beneath, reset it flush, and refill the joints. A single low unit in an otherwise flat field is usually a local bedding issue rather than a base failure.

Is polymeric sand worth using on a repair? It resists washout and suppresses weeds better than plain sand, but it demands full joints, a clean surface, and watering exactly as the manufacturer specifies. Applied carelessly it hazes the pavers and cracks out within a season.

How do I stop it sinking again? Fix the water. Redirect downspouts, correct the grade so water flows away, and ensure the surface drains. Do that alongside a base compacted in lifts and joints kept full, and the repair holds. Where the patio meets the house, the same regrade usually improves the entry threshold as well, worth raising with a Queens kitchen remodeling contractor if that door is being reworked anyway.

Building an Outdoor Fireplace or Fire Pit in Masonry

Outdoor fireplaces and fire pits are the request I get most as soon as the weather turns. In a neighborhood like Virginia-Highland here in Atlanta, where the backyards are made for entertaining, a masonry fire feature can be the best money a homeowner spends outside, or an expensive pile of stone that never draws right and cracks in a season. The difference is almost entirely in the planning most people skip because they are focused on how it will look.

Building an Outdoor Fireplace or Fire Pit in Masonry
Photo: Anonymous Unknown author · PDM

Fire pit or fireplace: pick by how you use the yard

A fire pit is social and open, people sit around it in a circle, it is cheaper, and it suits a casual yard. A fireplace is a focal point against one edge of a space, throws heat in one direction, offers some wind shelter, and costs considerably more because it is a tall masonry structure with a firebox and flue. Neither is “better.” Choose by whether you want a gathering circle or an outdoor room with a wall.

The details that make it work

Whichever you build, a few things separate a lasting feature from a callback:

  • Firebox materials. The parts that touch flame need firebrick and refractory mortar, which handle heat that would crack ordinary brick and standard mortar within a season.
  • A real foundation. A masonry fireplace is heavy and needs a proper footing, or it will settle and crack. A fire pit needs a stable, well-drained base.
  • Drainage and drying. Atlanta’s rain and humidity mean a fire pit needs drainage at the base so it is not sitting in water, which cracks masonry through any cool snap.
  • Draw, for fireplaces. The flue and opening have to be proportioned so smoke goes up, not into your guests’ faces. This is where amateur builds most often fail.

The firebox-and-flue thinking is the same as any chimney, so the maintenance and rebuild logic in should you reline or rebuild an old chimney applies here too.

Gas or wood, and the rules

Wood gives the classic experience and smell; gas gives instant, controllable, cleaner-burning fire and is increasingly popular. Either way, check local rules before you build, many jurisdictions and HOAs regulate open flame, setbacks from structures and property lines, and burn bans during dry spells. For wood-burning features, efficient, lower-smoke practices are covered by the EPA at EPA Burn Wise.

What to budget

A basic masonry fire pit commonly runs $1,500 to $5,000; a built masonry outdoor fireplace typically $6,000 to $20,000 depending on size, stone, and whether it includes a chimney, hearth, and wood storage. The cost is mostly skilled labor and the firebox materials, exactly the parts you should not let a bid cut.

Siting it right in the yard

Where you put a fire feature matters as much as how you build it, and this is where I see the most regret after the fact. Keep it well clear of the house, fences, and low tree canopy, both for the code-required clearances and for common sense about drifting sparks and heat. Think about the prevailing wind in your yard: a fireplace or pit placed so the smoke blows across the seating instead of away from it will get used half as much, no matter how nicely it is built. For a fireplace, orient the opening so it faces the seating and puts the solid back toward the wind, which both shelters the fire and pushes heat where people sit. Leave enough deck or patio around a fire pit for chairs plus a walking path behind them, usually a good six to seven feet of radius from the edge. And check sightlines from the house and neighbors, since a tall fireplace can block a view you wanted to keep. A little planning here is free; moving a built masonry feature later is not.

Frequently asked questions

What is the difference in cost between a fire pit and an outdoor fireplace? A masonry fire pit commonly runs $1,500 to $5,000, while a built masonry fireplace typically runs $6,000 to $20,000. The fireplace costs far more because it is a tall structure with a firebox, flue, and foundation, versus the fire pit’s simpler open form.

Do I need a permit for an outdoor fireplace? Often yes, and many HOAs have rules too. Jurisdictions commonly regulate open flame, setbacks from structures and property lines, and impose burn bans in dry conditions. Check with your local building and fire authorities before you build.

Can I use regular brick in a fire pit? Not for the surfaces that touch flame. Those need firebrick set in refractory mortar, which withstands high heat that would crack ordinary brick and standard mortar. Regular brick and block can be used for the outer structure, but the firebox itself must be built for heat. Enclosed versions have their own rules again — a Long Island sunroom builder putting a fireplace inside a three-season room is working to clearances, not just to firebrick.

Installing Stone Veneer Over a Block Wall

Stone veneer over concrete block is one of the most common upgrades I coordinate, and one of the most commonly botched. A client in Dupont Circle wanted a plain block garden wall dressed in stone, and the first bid we got skipped the two details that make or break the job. Done right, veneer over block lasts for decades. Done wrong, it holds water against the wall and starts shedding stone in a few years. The stonework people admire is the easy part; the wall behind it is where the job is won or lost.

Installing Stone Veneer Over a Block Wall
Photo: Hope Alexander · PDM

Full-bed versus thin veneer

First decision: full-bed stone (roughly three to five inches thick, needing a supporting ledge or footing) or thin veneer (about one inch, adhered to the wall without a separate footing). Thin veneer is far more common on retrofits over existing block because it adds little weight and needs no new foundation. Full-bed gives a deeper, more authentic look but has to be planned into the structure from the start. For most homeowners dressing an existing block wall, thin veneer is the practical choice.

The two details that actually matter

Over a block wall, especially any wall exposed to weather, the assembly behind the stone is what keeps it alive:

  • A moisture barrier and drainage plane. Water will get behind veneer; the assembly has to let it drain and dry rather than trapping it against the block. On exterior walls this means a weather-resistive barrier and, often, a drainage mat.
  • A proper scratch coat and bonding. Thin veneer is set in mortar over a prepared, often lath-and-scratch-coat surface so it actually bonds. Slapping stone onto bare, dusty block is the number one failure I see.

Because the block itself has to be sound first, this job assumes you understand what is behind it, which is why I recommend reading understanding concrete block (CMU) construction before you start.

Prep, then stone

The sequence on a typical exterior thin-veneer job runs: confirm the block is sound and clean, install the weather barrier and metal lath where required, apply a scratch coat and let it cure, then set the stone in mortar working bottom to top, and finally grout or point the joints (or leave a dry-stack look if the stone is designed for it). Rushing the cure or skipping the barrier is what causes callbacks.

What it costs and how to hire

Installed thin stone veneer commonly runs $20 to $45 per square foot depending on the stone and the wall prep required; full-bed runs higher because of the structural support. Manufactured and natural veneer installation standards are published by the Concrete Masonry and Hardscapes Association. When you hire, ask specifically how the contractor handles the moisture barrier and bonding, if they only want to talk about the stone pattern, keep looking.

Interior walls and the fireplace exception

Everything I said about moisture barriers applies to exterior walls, but a lot of veneer-over-block work happens indoors, on a basement feature wall or a fireplace surround, and the rules shift. On a dry interior wall not exposed to weather, you can skip the weather-resistive barrier, but you still need a sound, clean, properly prepared bonding surface, so the scratch coat or a proper adhesive system still matters. The fireplace is the one place I get strict again: any stone within the code-required clearance of a firebox has to handle heat, which means non-combustible materials and, for the firebox itself, firebrick and refractory mortar rather than decorative veneer. I have seen thin manufactured veneer set too close to a firebox discolor and let go over a couple of heating seasons. So indoors, relax about the drainage plane but not about the bond, and around any heat source, treat the clearances and materials as non-negotiable. When in doubt on a fireplace, check the appliance’s listed clearances and your local code before you set a single stone.

Frequently asked questions

Can you put stone veneer directly on a concrete block wall? Not directly onto bare block for a durable job. The block must be clean and sound, and an exterior wall needs a weather-resistive barrier and a proper bonding surface (often lath and a scratch coat) before the stone is set in mortar. Skipping that is the main cause of veneer failure.

What is the difference between thin veneer and full-bed stone? Thin veneer is about an inch thick, lightweight, and adhered without a separate footing, ideal for retrofitting over existing block. Full-bed stone is three to five inches thick, heavier, and needs structural support like a ledge or footing. Most retrofit projects use thin veneer.

Does stone veneer hold moisture against the wall? It can if the assembly is wrong. Water always gets behind veneer, so a correct installation includes a drainage plane and moisture barrier that let the wall drain and dry. A veneer applied without that traps moisture against the block and eventually fails. On commercial elevations that assembly gets washed on a schedule, and an industrial cleaning contractor in Atlanta works to a spec that keeps water out of the drainage plane.

Repointing, Tuckpointing, and Pointing Explained

Three words get used interchangeably on quotes and they do not mean the same thing. One describes finishing joints on new work, one describes a repair, and one describes a decorative technique that almost nobody actually performs any more. Knowing which is which changes how you read a bid, because the labor involved differs enormously.

Three words for three different operations

Pointing is the finishing of mortar joints as a wall is being built, shaping and compacting the mortar while it is still workable. Repointing is a repair: raking out failed mortar from an existing wall and replacing it with new. Tuckpointing is a decorative technique in which a coloured mortar matching the brick is applied and a fine contrasting line is set into it, producing the appearance of very precise thin joints on brickwork that is not that precise. In practice, most contractors say tuckpointing when they mean repointing, and most quotes that use the word are describing a repair.

What repointing actually involves

The work is mostly removal. Deteriorated mortar is cut out to a depth of roughly two to three times the joint width, which is deep enough for the new mortar to key in and not so deep as to disturb the wall. The cavity is cleaned and dampened, then filled in layers, each compacted before the next, and the joint is finished to profile at the right moment in the set. The skilled part is the raking out: done with an aggressive angle grinder in the wrong hands, it widens joints and chips brick edges permanently, and no amount of care with the new mortar hides it.

Why the words matter on a quote

A quote for tuckpointing at a low square-foot rate is almost certainly repointing, and that is fine, but it is worth confirming what depth of raking out is included and what mortar specification will be used. A quote for genuine tuckpointing should carry a much higher rate, because it is a slow decorative process. Where the two get conflated is where disputes start: the owner expected the fine-lined finish and received a competent repair, or expected a repair and is being charged for craftsmanship the wall does not need.

The mortar specification is the whole job

Everything else is secondary to getting the mix right. Mortar is meant to be weaker than the units around it, so that movement and salts are taken up by the joint rather than the brick. On older walls built with lime mortar, replacing it with a hard cement-rich mix creates a joint stronger than the brick, which forces moisture and stress into the brick face and spalls it. That damage is permanent and it is caused by the repair. Matching the existing mortar in strength, composition, and appearance is what separates repointing that lasts from repointing that destroys a wall slowly.

The joint profile is a weather decision

How the joint is finished is not only cosmetic. A concave or weathered profile is compacted and sheds water, which is why it is standard on exposed elevations. A raked or recessed joint creates a shadow line that looks striking and holds water on the upper ledge of every course, which in a freeze-thaw climate is a durability question rather than a style question. Matching the original profile also matters visually: a repointed patch finished differently from the surrounding wall reads as a patch from across the street, however good the mortar match is.

Frequently asked questions

How long should repointing last? Decades when correctly specified and executed, often comparable to the original mortar. Repointing that fails within a few years usually failed on preparation, insufficient raking depth or dirty joints, rather than on the mortar itself.

Does the whole wall need doing at once? No. Repointing is normally done where the mortar has failed, commonly on the most weather-exposed elevations first. Doing sound joints wastes money and disturbs a wall unnecessarily.

Why does mortar type matter so much? Because old brick is soft and needs a soft lime-based mortar that can move with it. Hard modern cement mortar is stronger than the brick and drives moisture and stress into the brick face, cracking and spalling it. Interior trim follows the same logic in reverse, since timber moves and its fixing has to allow for it, which is why a custom millwork shop will not pin a panel rigidly to masonry.

How to Get Masonry Quotes You Can Actually Compare

Three quotes for the same wall, thousands apart, and no way to tell which is right. The problem is almost never that one contractor is dishonest. It is that each of them was left to decide what the job consisted of, so three different jobs got priced, and the numbers were never comparable in the first place.

Write the scope before you make a call

The single change that makes bids comparable is deciding the scope yourself and handing the same document to everyone. It does not need technical language. Describe the area with rough dimensions, say what exists now and what should exist afterwards, note what is being removed and who disposes of it, state any material preference, and flag access constraints and anything that must be protected. Ask every contractor to price that document and to list anything they would add. Now the differences between bids are answers to the same question.

Vetting comes before pricing

Before I compare a single number, I confirm each contractor is licensed where the work requires it, carries liability coverage and workers’ compensation, and can show recent local work of the same type rather than of any type. An uninsured bid is not a cheaper bid, it is an uninsured one, and if someone is injured on the property or the work fails, the exposure lands on the owner. Guidance on vetting and hiring qualified masons is published by the Mason Contractors Association of America.

Insist on itemization

Ask for the price broken into demolition and disposal, excavation and base preparation, materials with specifications rather than categories, labor, equipment and access, and cleanup. Specifications are the part that matters: mortar type rather than the word mortar, base depth rather than the word base, and named products for drainage components. When a bid is itemized this way, comparison becomes mechanical, and the line causing the difference between two quotes usually identifies itself immediately.

The red flags that show up in the paperwork

A large deposit demanded before any material is ordered. A quote that will not itemize. Pressure to decide today, or a discount that expires. No written scope, only a total. A reluctance to provide an insurance certificate. Cash-only terms, or an offer to skip a permit as a favour, which usually means the permit could not be obtained. And a bid dramatically below the others, which is not generosity but a scope that has quietly lost the buried work.

What to ask while they are on site

The site visit is where the useful information is. Ask what the base will be and how deep, and why that depth for this soil. Ask where water will go. Ask who is actually on site each day and whether any of it is subcontracted. Ask how long the work will take and what happens if the ground turns out differently than expected. Ask what the warranty covers and for how long, in writing. A contractor who answers these specifically has thought about your job; one who answers in generalities is quoting from a template. It is also worth watching what they do rather than only what they say. Someone who walks the whole area, looks at where the downspouts discharge, probes the ground, and asks what the space is used for is gathering the information a real price depends on. Someone who paces the length, glances at the wall, and quotes from the driveway has priced an average job rather than yours, and averages are exactly what goes wrong once the excavation opens up.

Frequently asked questions

How many quotes are worth getting? Three is the usual answer and it works, provided all three price the same written scope. Ten quotes on an undefined job produce ten incomparable numbers and no more clarity than one.

Is a verbal quote ever acceptable? For a very small repair, perhaps. For anything structural or substantial, no. The written scope is what defines the work, and without it every disagreement later is a matter of recollection.

Should the lowest bid win? Not by default. The lowest bid usually wins by omitting something, often structural work that cannot be seen, such as footing depth or drainage. Compare itemized scopes, verify licensing and insurance, and buy the most complete work at a fair price. Coating quotes hide the same thing: an epoxy flooring installer in Las Vegas who omits surface prep will always look cheaper than one who priced the grinding.

Is That Crack Serious? Structural vs Cosmetic

As a contractor, I get sent photos of cracks almost weekly with the same one-line message: “Is this bad?” Most of the time it is not. But cracks are the language a masonry structure uses to tell you what is happening inside it, and reading them wrong in either direction costs money, either an unnecessary foundation repair or a real problem left to grow. Here is the triage I use before I ever recommend calling an engineer.

Is That Crack Serious? Structural vs Cosmetic
Photo: Amal Kumar · CC0

The pattern matters more than the length

Homeowners fixate on how long a crack is. What actually tells the story is its shape, width, and direction. A long hairline crack can be nothing; a short wide one can be serious. Start by reading the pattern rather than reaching for a tape measure.

Cracks that usually mean cosmetic

  • Fine hairline cracks (thinner than a credit card) in stucco, mortar, or a concrete surface, often from normal curing and shrinkage
  • Vertical cracks in a poured foundation that stay thin and do not offset, commonly shrinkage from curing
  • Map or crazing patterns on a surface finish, cosmetic almost always

These are worth sealing to keep water out, but they rarely signal a structural issue on their own.

Cracks that mean call someone

  • Stair-step cracks following the mortar joints in block or brick, a classic sign of foundation movement or settlement
  • Horizontal cracks in a basement or foundation wall, often the most serious, they can mean soil or water pressure is bowing the wall inward
  • Wide cracks (roughly a quarter inch or more) or any crack where one side has shifted out of plane from the other
  • Cracks that keep growing over weeks or months, or that appear with sticking doors and windows

Stair-step cracking in particular usually ties back to what is happening in the mortar joints, which I break down in how to tell when mortar has failed.

A simple monitoring trick

If you are unsure, monitor before you panic. Mark the ends of a crack with a dated pencil line, or bridge it with a small dab of plaster, and check over a few weeks. A crack that stays put is far less urgent than one that visibly moves. This cheap step has saved more than one of my clients from a rushed, expensive repair. Building-code guidance on structural evaluation is coordinated through the International Code Council, and any crack that is widening, horizontal, or offset warrants a professional look rather than a wait-and-see.

Where the crack is matters as much as what it looks like

Two cracks that look identical can mean very different things depending on where they sit, so I always note location before I judge severity. A crack near the corner of a window or door opening is often just stress concentrating at a weak point in the wall and is frequently cosmetic. The same width crack running horizontally across the middle of a basement wall is a different animal, because that is where soil pressure peaks. Cracks that step diagonally up through the mortar joints of a block or brick wall point to differential settlement, one part of the foundation moving relative to another. Vertical cracks that are wider at the top than the bottom, or vice versa, tell you which way things are tilting. And a crack that lines up with a beam, a post, or a point load above it is worth taking seriously because something concentrated is bearing there. Read the location and orientation together with the width, and the wall usually tells you whether to seal it and move on or pick up the phone.

Frequently asked questions

Which foundation cracks are dangerous? Horizontal cracks, stair-step cracks along mortar joints, cracks wider than about a quarter inch, and any crack where the two sides have shifted out of alignment. These can indicate settlement or soil pressure and should be evaluated by a professional.

Are hairline cracks in a foundation normal? Often yes. Thin vertical cracks in poured concrete are commonly shrinkage from curing and are mostly cosmetic, though sealing them keeps water out. The concern is width, offset, horizontal orientation, and growth over time, not the mere presence of a fine crack.

How can I tell if a crack is getting worse? Mark the ends with a dated line or bridge it with a small dab of plaster and check over several weeks. A crack that stays the same is far less urgent than one that visibly widens or lengthens. Growth, especially with sticking doors or windows, means call a professional. A slab tells you the same way — an Austin garage epoxy installer will monitor a floor crack before coating over it, because a coating hides movement without stopping it.

Those White Stains on Brick: What They Mean and How to Fix Them

The chalky white bloom on brickwork gets treated as a stain, something to scrub off and forget. It is better understood as a receipt. Salt does not appear on a wall by itself; it arrives dissolved in water that came from somewhere, moved through the masonry, and evaporated at the face. The deposit is the record of that trip.

The white is salt the wall carried out

Soluble salts exist in most masonry materials, in the units, in the mortar, and in the ground below. When water passes through the wall it dissolves them and carries them along. At the surface the water evaporates and the salt is left behind as a crystalline deposit. Three ingredients are required and all three must be present: a source of salt, water to mobilise it, and a path to the surface. Removing any one of them ends the problem, and only one of them is usually practical to remove.

New-construction bloom versus a symptom

Not every occurrence means something is wrong. New masonry contains construction water and it has to leave, so a bloom appearing in the first months on new brickwork is common, usually self-limiting, and often gone after a season or two of weathering. What is not normal is the same deposit returning year after year on an established wall, or appearing on one specific area, or reappearing weeks after cleaning. That pattern is a wall with an ongoing water supply, and the deposit is pointing at it.

Removing it without making it worse

Start dry. A stiff bristle brush on a dry wall removes a surprising amount, and dry removal avoids redissolving the salt and driving it back in. What is left often responds to water and a brush, worked in small areas and rinsed. Proprietary efflorescence removers exist for stubborn deposits and should be tested on an inconspicuous patch first. Acid is the risky option: it can etch the brick face, damage lime mortar, and sometimes causes a worse secondary bloom, so it belongs last on the list rather than first. Whatever the method, do not clean a wall that is currently wet.

Finding the water, which is the actual job

Look above the deposit before looking at it. The usual sources are a leaking or overflowing gutter, a downspout discharging against the wall, failed or missing flashing at a sill, parapet, or roof junction, a defective coping letting water into the top of the wall, sprinklers or irrigation overspray hitting the masonry, and rising damp where a wall wicks moisture from the ground. The location of the bloom is informative: a horizontal band suggests a specific entry point above it, while a general low-level appearance across an elevation suggests ground moisture. Timing helps too. A deposit that appears after every heavy rain and fades between them points at a defect that only leaks under driving conditions, whereas one that persists through dry spells is being fed continuously, which narrows it to irrigation, a plumbing leak, or ground water.

The related problem you do not want

Sometimes the salt crystallises inside the pore structure rather than at the surface, and that version is a different order of concern. The crystals grow within the brick and exert pressure from inside, which spalls the face off in flakes. It shows up as crumbling and loss of the fired skin rather than as a white deposit. The response is the same, find and stop the water, but the damage already done is permanent and the affected units eventually need replacing.

Frequently asked questions

Is efflorescence structurally serious? The deposit itself is harmless. What it indicates, water moving through the wall, can lead to serious problems including freeze-thaw damage and internal salt crystallisation, so it is a symptom worth acting on rather than an emergency in itself.

Will sealing the wall stop it? Usually not, and it can make things worse. A surface sealer does not remove the water, and a film-forming product traps moisture behind it, which pushes the crystallisation inward where it does real damage.

Why does it keep coming back after cleaning? Because cleaning removes the salt but not the water supply. Recurring deposits mean finding and fixing the source, whether that is flashing, gutters, irrigation, or rising damp, rather than scrubbing again. Freestanding hardscape shows the same pattern, and on those walls the culprit is often man-made rather than meteorological, which is why a San Diego hardscaping crew checks sprinkler throw before anything else.

Why Drainage Makes or Breaks a Retaining Wall

Walk past a failed retaining wall and the temptation is to conclude it was built too light for the job. Usually it was built correctly for the load it was designed against, and then asked to hold back something heavier. Water is what changed the load, and drainage is the part of the wall that was supposed to prevent that.

Saturated soil is a different load entirely

Dry granular backfill pushes against a wall with a pressure that engineers can calculate confidently. Fill that same soil with water and two things happen at once. The soil gets heavier, and the water itself exerts hydrostatic pressure that increases with depth and does not care how well the units interlock. The combined effect can approach double the design load, applied lowest down where the leverage is greatest. A wall does not need to be underbuilt to fail under that; it only needs to be built for the dry case.

What a working drainage detail contains

Four elements, and all four have to be present. A zone of clean angular stone directly behind the wall face, wide enough to be continuous rather than a token shovelful. A perforated pipe at the base of that zone, laid to fall. An actual outlet where the pipe discharges to daylight or to a drain, because a pipe that ends in soil is decoration. And filter fabric separating the stone from the native soil, so fines cannot migrate in and clog the voids over a few seasons. Weep holes through the face help on some systems, but they do not replace the stone zone.

Why it is the first thing a cheap bid removes

Everything in that list is buried on the day the job finishes. Nothing about the completed wall reveals whether the stone zone is a foot wide or three inches, whether the pipe goes anywhere, or whether fabric was used. Meanwhile it represents real material and real excavation. That combination, invisible plus expensive, is what makes drainage the standard omission when a bid needs to come in under the others, and it is why the wall looks identical to a correctly built one for the first couple of years.

Reading a wall that is already losing

The signs arrive in a fairly reliable order. Water seeping through the face or standing at the base after rain says the drainage is not moving water. Efflorescence on the face says water is passing through the wall and evaporating out. Then comes movement: a bulge in the middle third of the height, units rotating forward at the top, a section leaning away from the rest, or the soil behind settling into a trough as fines wash out. Once the face has moved, monitoring is no longer the appropriate response.

Retrofitting drainage into an existing wall

It is possible and it is not cheap, because the backfill has to come out. The work is excavating behind the wall, cleaning the face, installing the stone zone, pipe, and fabric properly, and backfilling in compacted lifts. It costs a fraction of a rebuild and it addresses the actual cause. The one precondition is that the wall itself is still sound: a structure that has already bulged or rotated needs assessment before anyone spends money on drainage, because the retrofit will not straighten it.

Frequently asked questions

Do low garden walls need drainage too? Any wall retaining soil benefits, and the shorter the wall the cheaper it is to do properly. Walls under a couple of feet holding well-drained soil are the usual exception, but a low wall at the bottom of a slope that collects runoff is not a low-risk wall.

Is landscape fabric behind the wall enough? No. Fabric separates soil from stone; it does not create the drainage path. Without the stone zone and a pipe with an outlet, fabric on its own changes very little.

Can drainage be added to an existing wall? Yes, by excavating behind it and installing stone, pipe, and filter fabric. It is labor-intensive but far cheaper than rebuilding after a failure, and a leaning or bulging wall should be assessed before any retrofit. Check what else discharges nearby while the trench is open: an HVAC contractor in Roswell can move a condensate line out of the backfill in the same visit.