Keeping a Paver Patio Looking New: Sealing and Upkeep

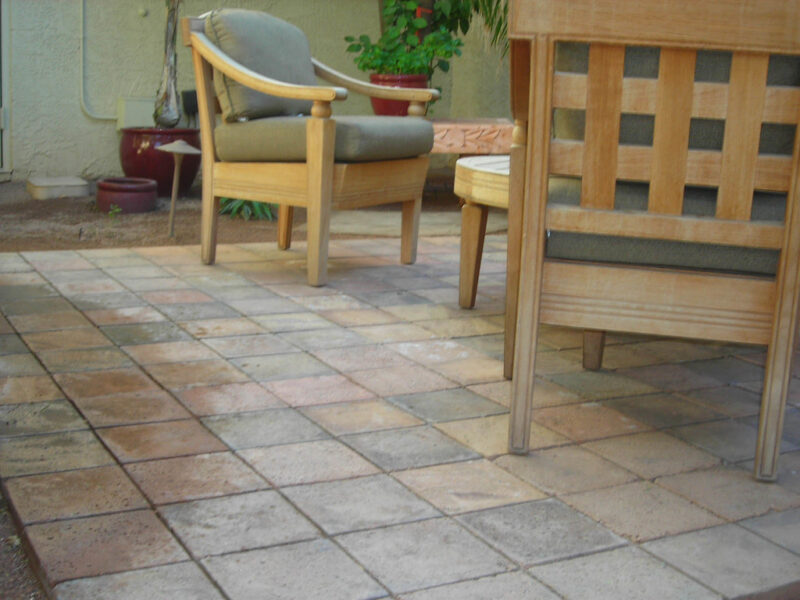
A paver patio is one of the few masonry surfaces homeowners can genuinely maintain themselves, and one of the few they routinely wreck by overdoing it. Down here in Mandarin, on Jacksonville’s south side, the combination of heat, humidity, and afternoon downpours means patios grow weeds and algae fast, and I get a lot of calls from people who sealed theirs and ended up with a cloudy, slippery mess. Maintenance is simple if you understand what the joints are actually doing.
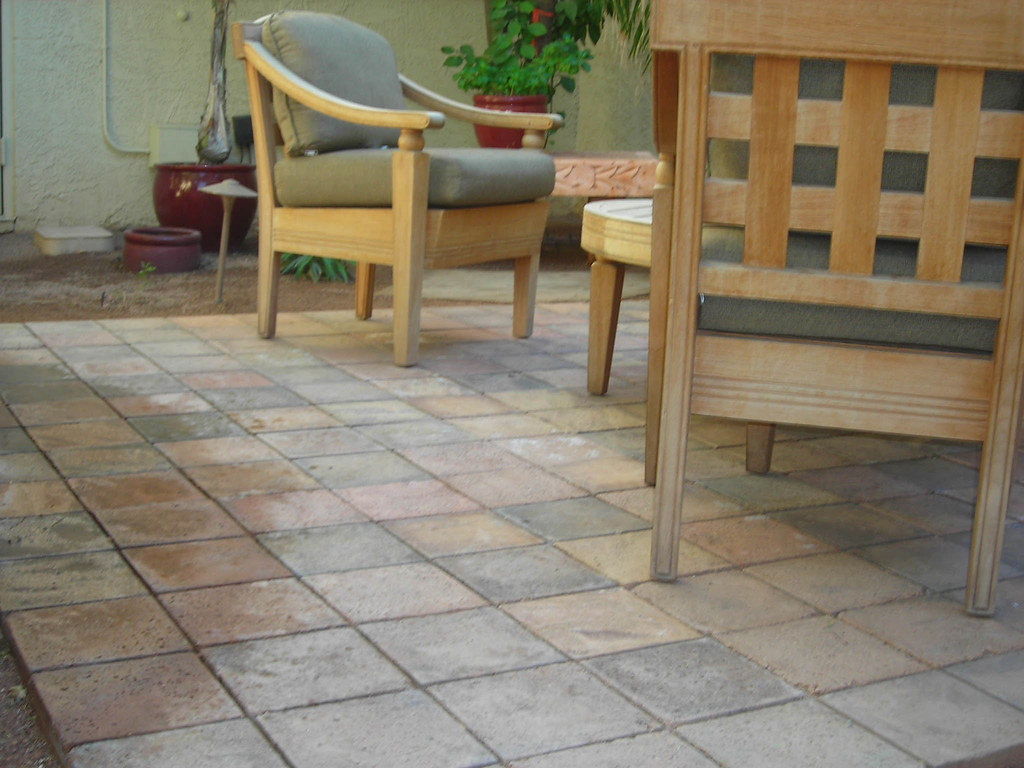
Keeping a Paver Patio Looking New: Sealing and Upkeep
Photo: Arto Brick · BY 2.0

The joint sand does the real work

A paver patio is not held together by the pavers; it is held together by what is between them. Interlock comes from the sand packed in the joints, which lets the field of pavers move as a unit and share load. When that joint sand washes out, the pavers loosen, shift, and start to rock. So the single most important maintenance task is keeping the joints full, and in a rainy climate like Jacksonville’s that means checking them at least once a year.

Polymeric sand versus regular sand

Most patios today use polymeric sand, which contains a binder that hardens when wetted, locking the joints and resisting washout and weeds far better than plain sand. When joints look low, sweep in fresh polymeric sand, compact, and activate it with a light mist exactly as the product directs. The most common mistake I see is overwatering during activation, which floods the binder out onto the paver faces and leaves a haze. Follow the wetting steps precisely.

Cleaning without wrecking the surface

For routine cleaning:

  • Pull or spot-treat weeds early before roots widen the joints
  • Wash with mild soap and water or a dedicated paver cleaner for algae and grime
  • Keep pressure washers on a low, fanned setting and off the joints, high pressure blasts the sand right out

If the patio has already sunk or heaved in spots, cleaning will not fix the underlying base, and you are into the releveling work I cover in fixing a sunken or uneven paver patio.

To seal or not to seal

Sealing a paver patio is optional and, unlike vertical brick, can be appropriate here because pavers are dense and the sealer helps lock joint sand and resist stains. But a film-forming “wet look” sealer on a humid, shaded patio can trap moisture and turn slippery or cloudy. If you seal, choose a breathable penetrating product, make sure the pavers are fully dry first, which is a real challenge in Jacksonville humidity, and reapply every few years. Hardscape maintenance and joint guidance is published by the Concrete Masonry and Hardscapes Association. Expect to spend $0.50 to $2 per square foot on sealing materials if you do it yourself, more if a pro handles prep and application.

A simple seasonal routine for a humid climate

Down here the patios that stay nice are the ones with an owner who does a little and often, rather than nothing for three years and then a panic. The routine I hand my Jacksonville clients is short. In spring, before the heat and the afternoon storms set in, walk the patio and top up any low joints with fresh polymeric sand, then give the surface a gentle wash to knock back the winter’s algae. Through the summer, pull weeds the week you see them, because a Florida weed left a month has roots widening the joint. After the wettest part of the season, check the low spots for any pavers that have started to rock, an early sign the base is moving. And once every few years, if you seal, reapply the breathable repellent on a stretch of dry days. None of it is hard, and it is a fraction of what a full reset costs once the joints wash out and the field goes loose.

Frequently asked questions

Do I need to seal my paver patio? No, sealing is optional. Pavers perform fine unsealed. Sealing can help lock joint sand and resist stains, but in humid or shaded conditions a film-forming sealer can trap moisture and get slippery. If you seal, use a breathable penetrating product on fully dry pavers.

How do I keep weeds out of paver joints? Keep the joints full of polymeric sand, which resists weed growth, and pull or spot-treat any weeds early before their roots widen the joints. Weeds in pavers usually signal that joint sand has washed out and needs topping up.

Can I pressure wash a paver patio? Yes, but carefully. Use a low, fanned setting and avoid aiming directly into the joints, because high pressure blasts out the sand that holds the patio together. After any thorough wash, plan to refill and recompact the joint sand. The same restraint applies to anything wooden nearby — a Brooklyn millwork shop will tell you a pressure washer takes the surface off exterior trim long before it cleans it.


Old Chimney: Reline It or Rebuild It?

An old chimney rarely fails all at once. It gives you years of small warnings, and the choice between relining it and rebuilding it usually comes down to how many of those warnings got ignored. I have relined chimneys that had decades left in them and torn down others that were held together by paint and hope. Knowing which situation you are in saves both money and, occasionally, a house fire.

Old Chimney: Reline It or Rebuild It?
Photo: Gareth1953 All Right Now · BY 2.0

Two different problems

It helps to separate the chimney into two parts, because they fail for different reasons. The liner is the inner flue that carries smoke and combustion gases safely up and out. The structure is the brick or block stack you see. Relining fixes the first; rebuilding addresses the second. A chimney can have a shot liner and a perfectly sound structure, or a fine liner inside a stack that is crumbling at the top.

When relining is the answer

Relining makes sense when the masonry stack is structurally sound but the flue is cracked, undersized, or missing. Common triggers include an old unlined chimney, a clay tile liner cracked by a flue fire or settlement, or switching to a new appliance that needs a different flue size. Options range from stainless steel liners to cast-in-place systems, and a good sweep will run a camera up the flue before recommending anything. Relining a residential flue commonly runs $2,500 to $7,000 depending on the method and height.

When rebuilding is unavoidable

Rebuilding, in part or in full, becomes the honest answer when the structure itself has failed:

  • The brick above the roofline is spalling, leaning, or has open joints all around
  • The crown is cracked and has let water into the stack for years (the failure I detail in why chimney crowns fail)
  • Mortar has washed out deep into the stack, not just the surface joints
  • The chimney is pulling away from the house

Often the fix is a partial rebuild: tearing down and relaying just the exposed portion above the roofline, which takes the worst of the weather. That runs commonly $2,000 to $6,000. A full rebuild from the firebox up is a much bigger job and can exceed $10,000.

How to make the call

Get a chimney professional to inspect and, ideally, to show you camera footage of the flue and photos of the crown and upper stack. Be wary of anyone who quotes a rebuild without inspecting the liner, or a reline without looking at the structure; the two problems are independent. Because chimneys are combustion appliances, safe operation and maintenance guidance is available through the EPA’s wood-heat program at EPA Burn Wise. When the liner is bad but the stack is sound, reline. When the structure is failing, no liner will save it, and patching just delays the rebuild.

Get a real inspection before you decide

Neither relining nor rebuilding should be decided from the ground with a pair of binoculars, yet that is how a lot of quotes get written. A proper chimney inspection looks at the whole system: the flue interior with a camera, the crown and cap, the exterior masonry at and above the roofline, the flashing where the chimney meets the roof, and the firebox and smoke chamber. That is the difference between a level-one glance and the more thorough evaluation you want before spending money. Ask to see the camera footage and photos yourself; a trustworthy chimney professional expects that and will walk you through what each image shows. Be especially wary of anyone who arrives, glances up, and immediately quotes a full rebuild, or conversely promises a reline will fix a stack that is visibly crumbling at the top. The inspection is cheap relative to the repair, and it is the only way to separate a liner problem from a structural one, which is the whole question.

Frequently asked questions

Is it cheaper to reline or rebuild a chimney? Relining is usually cheaper when the masonry structure is sound, often $2,500 to $7,000. Rebuilding is warranted when the brick and mortar have failed, and a partial rebuild above the roofline commonly runs $2,000 to $6,000. They solve different problems, so the right choice depends on what has actually failed.

How do I know if my chimney liner is bad? A camera inspection is the reliable way. Warning signs include pieces of clay tile in the firebox, draft problems, and staining, but only a scan up the flue confirms cracks or gaps. Any chimney that has had a flue fire should be inspected before use.

Can I just leave an old unlined chimney alone? Not if you are burning in it. An unlined or failed flue lets heat and combustion gases reach the surrounding structure, which is a fire and carbon-monoxide risk. If the chimney is decorative and unused, it still needs to be kept weather-tight so it does not decay.

Fieldstone, Limestone, Bluestone: A Regional Primer

People ask me for “stone” the way they ask for “a car.” There are dozens of choices under that one word, and the right one depends on where you live, what you are building, and how much you want to spend keeping it up. I have laid all the common types over the years, and the differences between them are practical, not just cosmetic. Here is the primer I wish more homeowners had before they picked.

Fieldstone, Limestone, Bluestone: A Regional Primer
Photo: Chicago Art Department · BY 2.0

Fieldstone: the local, rugged option

Fieldstone is exactly what it sounds like, stone gathered from the ground rather than cut from a quarry. It is irregular, comes in whatever colors the local geology offers, and gives you that rustic, been-here-forever look. It is a favorite for freestanding walls, rustic veneers, and country-property landscaping. The tradeoff is labor: because every piece is a different shape, a skilled mason spends real time fitting them like a puzzle, so the material may be cheap while the installation is not.

Limestone: workable and warm

Limestone is a sedimentary stone that ranges from creamy white to warm buff and tan. Masons like it because it is relatively soft and easy to cut and shape, which makes it common for veneers, coping, sills, and steps. That same softness is its weakness: it is more porous than granite, absorbs water, and in harsh freeze-thaw or heavy salt exposure it can weather faster. In a hot dry climate it holds up beautifully; in a wet freezing one it needs the right detailing.

Bluestone: the hardscape workhorse

Bluestone, a dense sandstone quarried mainly in the northeastern U.S., is the go-to for patios, walkways, treads, and pool coping. It is hard, wears well underfoot, and comes either thermal (a consistent sawn finish) or natural cleft (a textured surface with more grip). It is one of the more expensive materials by the square foot, but for a horizontal surface people walk on every day, its durability earns the cost.

Matching stone to the job

A few rules I follow:

  • Horizontal, high-traffic surfaces (patios, steps): favor dense stone like bluestone or granite.
  • Vertical veneers and walls where looks lead: fieldstone or limestone give the most character.
  • Freeze-thaw climates: choose denser, less porous stone and detail for drainage.
  • Hot dry climates: softer stones like limestone perform well and stay cooler than dark dense stone.

If you are weighing natural stone against the manufactured look-alikes, the cost and longevity math is a whole separate decision I lay out in natural stone versus manufactured veneer.

What to budget

Material alone ranges widely, roughly $15 to $50 per square foot depending on the stone and whether it is full-bed or thin veneer, with installation often matching or exceeding that because stonework is slow, skilled labor. Selection, sourcing, and hardscape detailing guidance is available through the Concrete Masonry and Hardscapes Association. Buy from one lot where you can, because stone color varies batch to batch, and always order more than the plan calls for so your repairs years later still match.

Full-bed versus thin veneer changes the math

One thing that trips people up when they price stone is that the same stone comes two ways, and it changes both the look and the cost. Full-bed stone is the real thing at full thickness, three to five inches, which reads with genuine depth and shadow but is heavy enough to need a supporting ledge or footing. Thin veneer is the same stone sawn down to about an inch, light enough to adhere to a wall without a separate foundation, which makes it the practical choice for dressing an existing block wall or a house exterior. Thin veneer costs less to ship and to install, but on close inspection the shallow edges can give it away, so I steer clients toward full-bed where the stone meets the eye at close range, like a seat wall cap or a column, and thin veneer for broad vertical faces. Whichever you pick, order from a single lot and buy extra, because stone color drifts batch to batch and a repair years later has to match.

Frequently asked questions

What is the most durable natural stone for a patio? Dense stones like bluestone and granite wear best underfoot and resist weathering. Bluestone in particular is a proven patio and walkway material because it is hard, comes in slip-resistant cleft finishes, and holds up to daily traffic and weather.

Is limestone a good choice in a cold climate? It can be, but choose a denser limestone and detail it carefully for drainage. Because limestone is porous, poor detailing lets it absorb water that then freezes and spalls the stone. In hot dry climates limestone is an excellent, low-stress choice.

Why is stonework so expensive to install? Because it is slow, hand-fitted work. Irregular stone like fieldstone has to be selected and shaped piece by piece, so even inexpensive material carries high labor. The installation, not the stone, is usually the bigger line item.

Brick Cleaning and Restoration in Historic Philadelphia

The first time I inspected a Society Hill townhouse, the owner proudly told me they had the front cleaned with a pressure washer the summer before. I could see exactly where the wand had been: the soft 18th-century brick had a faint corduroy pattern of erosion, and the fired skin that protects the brick was gone in patches. Philadelphia has some of the oldest brick housing stock in the country, and cleaning it wrong does damage you cannot undo. Restoration here is a specialty, not a weekend job.

Brick Cleaning and Restoration in Historic Philadelphia
Photo: lisafree54 · CC0 1.0

Why old Philadelphia brick is so unforgiving

Brick made before the 20th century was fired in less consistent kilns at lower temperatures. The result is a brick with a hard outer skin and a much softer body. That skin is everything. Once you blast, grind, or acid-burn it off, the exposed body soaks up water and starts to erode and spall, especially through Philadelphia’s freeze-thaw winters. Society Hill, Old City, and the older stretches of South Philadelphia are full of homes where a single aggressive cleaning in the 1980s is still causing decay today.

The right way to clean historic brick

Preservation practice follows a simple principle: use the gentlest method that works. That means starting with plain water and soft brushes, stepping up to specialized low-pressure systems and masonry-safe detergents only as needed, and testing every method on a hidden patch first. The National Park Service lays this out in its widely used guidance on cleaning historic masonry through the Preservation Briefs, and any serious restoration mason in the city will know it cold. The methods that are explicitly discouraged, high-pressure blasting, sandblasting, and harsh acids, are exactly the ones cheap operators reach for because they are fast.

Cleaning is only half of restoration

On most historic Philadelphia rowhomes, the brick and the mortar need attention together. Decades of grime usually sit alongside failed joints, and repointing old brick requires a soft lime-based mortar that matches the original, not the hard modern Portland mix that cracks the surrounding brick. When you are choosing someone for this work, look specifically for a restoration background rather than a general mason; hiring a Philadelphia restoration mason who has worked on protected historic facades is the difference between a house that looks right for another century and one that has to be patched again in five years. The gentle-cleaning mindset carries straight over to maintenance, which I cover in cleaning brick without damaging the mortar.

What restoration costs and what to watch for

Gentle cleaning of a rowhome facade typically runs $8 to $20 per square foot depending on the condition and the method, and full restoration that includes repointing and spot brick replacement can push well beyond that on a historic property. It is more than a pressure-wash quote, and it should be. In many Philadelphia historic districts, exterior work also needs Historical Commission review, so confirm approvals before anyone touches the wall. The expensive mistake is not the restoration; it is the cheap cleaning that forces a restoration a few years early.

Why the cheap cleaning costs the most

The pattern I see over and over in these old neighborhoods is a homeowner who saved money on a cleaning and paid for it twice. A pressure-wash or acid clean is fast and cheap because it is aggressive, and aggressive is exactly what soft historic brick cannot take. The fired skin comes off, the exposed body starts drinking water, and within a few winters the same facade needs real restoration, replacing spalled brick, repointing with matched mortar, work that costs many times what a gentle cleaning would have. So the true price of the bargain job is the restoration it forces early, plus the loss of original brick that can never be perfectly matched. On a century-old Philadelphia rowhome, the gentlest effective method is not just the safest choice, it is the cheapest one measured over the life of the wall. Spend a little more up front on the right approach and you spend far less over the decades you own the house.

Frequently asked questions

Can I pressure wash my historic brick house? No, not with standard high pressure. It strips the hard fired skin off soft older brick and accelerates erosion and spalling. Historic brick should be cleaned with the gentlest effective method, usually low pressure, water, and soft brushing, tested on a hidden area first.

Do I need approval to clean or restore a facade in a Philadelphia historic district? Often yes. Exterior work on properties in designated historic districts typically requires Historical Commission review before you start. Check with the city and your contractor before any cleaning, repointing, or brick replacement begins.

Why can’t I use regular mortar to repoint old brick? Old soft brick needs a soft lime-based mortar. Hard modern Portland-cement mortar does not flex with the brick and forces moisture and stress into the brick face instead of the joint, causing the brick to crack and spall. Matching the original mortar is essential on historic work.

Where Your Masonry Budget Actually Goes

Homeowners usually build a mental budget for masonry out of material prices, because those are the numbers that are easy to look up. A pallet of block has a price. A ton of stone has a price. Then the quote arrives at three times the arithmetic and the reaction is that someone is overcharging. Almost always, the gap is time.

Most of the number is time, not material

On a typical residential masonry job, labor is the larger half and often considerably more. Units get placed by hand, one at a time, to a line, level and plumb, and the rate that work proceeds at has not changed much in a century. Around the placing sits a great deal of work that produces nothing visible: setting up and moving scaffold, mixing batches, barrowing material to the work face, cutting units, protecting finished work overnight, and cleaning down at the end of each day. A crew day is the real unit of cost, and the quote is mostly a count of them.

What actually moves the price

Four things dominate. Access comes first, and it is the one homeowners consistently underestimate: a wall reachable by truck is a different job from the same wall at the bottom of a garden reached through a house. Height is second, because everything above about waist level needs scaffold and everything above a storey needs more of it. Demolition and disposal is third, since masonry debris is heavy and dump fees are charged by weight. Ground conditions are fourth, and they are the wildcard, because rock, poor bearing, buried services, or a water table that shows up in the excavation all change the work after the price was agreed.

Why the low bid is usually the expensive one

When one bid comes in far under the others, the money almost always came out of the part that will be buried. Footing depth, aggregate base thickness, compaction in lifts, drainage, and reinforcement are the standard candidates: they are invisible on completion, they are what the wall depends on, and leaving them out produces something that looks identical for the first two years. The rebuild that follows costs the original saving several times over, because it includes demolishing the first attempt.

Getting a number that means something

Ask for itemization and read the buried lines rather than the total. Where two quotes differ, identify the specific item that accounts for it and ask both contractors about that item. A contractor who can explain why the base is a given depth for this soil is quoting a designed job. Get the scope in writing with dimensions and specifications, tie payments to milestones instead of a large deposit, confirm insurance is current, and agree in advance how unforeseen ground conditions get priced, because that is the argument that otherwise happens mid-job.

Where you can save without buying a problem

There is genuine room to reduce cost, just not in the ground. Simplifying geometry helps most: curves, steps, corners, and level changes all add cutting and setting-out time. Choosing a standard unit over a premium one changes material cost without touching structure. Scheduling in the off-season sometimes improves the rate. Doing your own site clearance, demolition of non-structural elements, or landscaping afterwards genuinely removes hours from the bill. And combining jobs so one scaffold serves several tasks is often the largest single saving available on an elevation. If repointing, a chimney repair, and a window sill all need attention, doing them in one visit costs meaningfully less than three separate mobilisations, and the scaffold is usually the reason why.

Frequently asked questions

Why is labor such a large share? Because the work is manual and sequential, and the supporting activity around it is substantial. Material can be delivered in an hour; placing it correctly takes days, and no part of that has been automated on residential jobs.

Are cost-per-square-foot figures useful? Only as a rough sanity check. They ignore access, height, ground conditions, and demolition, which are exactly the variables that make two superficially similar jobs differ by a factor of two.

Does doing some work myself really help? It can, if the work is genuinely separable: clearing the site, removing a fence, handling disposal, or restoring the garden afterwards. Trying to share the skilled work usually costs more than it saves, because the crew ends up waiting or reworking.

Should You Seal Brick and Stone? The Honest Answer

Sealing masonry sounds like straightforward preventive maintenance, in the same category as painting trim. It is not, and the reason is that a masonry wall is not designed to keep water out in the way a roof is. It is designed to absorb some water and then release it. A product that interferes with the releasing half can do more damage in five years than the weather would have done in fifty.

Masonry is built to get wet and dry out again

Brick and stone are porous by nature, and the wall assembly assumes it. Water enters during driving rain and leaves by evaporation once the weather changes. Salts dissolved in that water move with it and crystallise harmlessly at the surface. Interrupt the outward path and the water still gets in, through joints, through flashing gaps, through the top of a wall, or up from the ground, but now it has to go somewhere else. It sits in the pore structure, freezes, and blows the face off the brick from behind. The failure looks like weather damage and is actually trapped moisture.

Film-formers versus penetrating repellents

The two categories behave differently and get sold in the same aisle. A film-former, typically acrylic or urethane, leaves a coating on the surface. It gives a wet look, resists staining well, and substantially reduces vapour transmission, which is what makes it risky on a wall that gets wet from behind. A penetrating repellent, usually silane or siloxane based, soaks into the surface and changes how the pore walls interact with water without closing them. Liquid water beads and runs off, water vapour still escapes. On vertical masonry, the penetrating type is almost always the right family.

Where sealing genuinely earns its cost

There are real cases. Horizontal surfaces take far more punishment than walls: steps, caps, sills, and hearths hold standing water and get salted in winter, and a breathable penetrating sealer meaningfully extends their life. Concrete exposed to de-icers benefits for the same reason. Below-grade and splash zones, where masonry is repeatedly wetted, are candidates. So is a wall in an exposed situation with a driving-rain problem that has already been diagnosed. In each of those, the sealer is addressing a specific mechanism rather than being applied as a general precaution.

Where it does damage

Sealing over an active water problem is the classic mistake: the leak is still there, and now the escape route is closed. Sealing historic soft brick with a film-former is another, because those walls have a large appetite for moisture movement and very little tolerance for having it stopped. And sealing a wall that is already saturated locks the water in on the day of application. If a wall is damp, the sequence is to find the source, fix it, let the wall dry out over a season, and only then consider treatment.

Reading a label before you buy

Three things on the container decide whether a product is suitable. Look for a stated vapour permeability or an explicit description as breathable, because a product that does not mention it usually is not. Look at the chemistry: silane and siloxane are penetrating, acrylic and urethane are film-forming. And look at the stated service life, which for penetrating repellents is commonly measured in a handful of years, not decades, so it is a recurring cost rather than a one-time fix. Test any product on an inconspicuous area first, since some darken stone permanently.

Frequently asked questions

Will sealing stop a leaking wall? No. Leaks come from failed flashing, open joints, a defective cap, or ground water, and a surface treatment addresses none of those. Sealing a leaking wall usually makes the eventual damage worse by trapping the water.

How often does a sealer need reapplying? Penetrating repellents typically need renewal every few years depending on exposure, with horizontal and south-facing surfaces first. That interval is worth knowing before starting, because a partially treated elevation weathers unevenly.

Is new brickwork worth sealing? Generally not. New brick is sound and the joints are fresh, so there is little to gain, and early sealing can trap construction moisture and produce efflorescence. Let the wall go through a full year of weather first.

A Homeowner’s Guide to CMU Block Construction

Concrete block gets treated as the plain option, the thing you use where nobody will see it. That reputation comes from how it looks rather than how it performs. A block wall is one of the few residential assemblies that can be tuned after the units are on site, and understanding how it gets its strength explains most of what a homeowner needs to decide.

A block is a shape, and the shape is the point

A standard unit is nominally eight by eight by sixteen inches including the mortar joint, and it is hollow. Those voids, called cells, are not there to save material. They are a continuous vertical channel through the wall, and what goes into them determines what the wall can do. Left empty, the wall is a stack of units held together by mortar and good only in compression. Filled with grout around vertical steel, the same wall becomes a reinforced element that resists bending and lateral pressure. Two walls built from identical units can differ by an order of magnitude in capacity.

Grout and steel turn a stack into a wall

Reinforcement comes in two directions. Vertical bars sit in the cells and are grouted solid, tying the wall down into the footing so it cannot rotate or slide. Horizontal reinforcement, either wire laid in the bed joints or bars in special bond-beam units, ties the length of the wall together and controls cracking. Where the steel goes, how far apart, and which cells get grouted are design decisions, not site decisions. This is exactly what an engineer specifies on a basement or retaining wall, and it is the part most commonly omitted when a wall is built without a design.

Where block outperforms everything else

It is dimensionally consistent and fast to lay, which makes it economical for anything long or tall. It is non-combustible, and assemblies achieve good fire ratings without additional treatment. It has substantial thermal mass, which flattens out daily temperature swings inside. It is not attractive to insects and does not rot. And because the cells are accessible until the grout goes in, services and reinforcement can be run inside the wall itself.

The two places block struggles

Thermal performance is the first. Mass is not insulation, and a bare block wall has a poor R-value, so any conditioned space needs continuous insulation added rather than relying on the mass. Insulating the cells alone leaves the webs as thermal bridges and delivers less than people expect. Appearance is the second, and it is why block usually ends up behind a veneer, a render, or below grade. Where a block wall is left exposed, the alternatives are architectural units with a split or ground face, which change the cost basis of the job entirely.

Reading an existing block wall from outside

You can learn a fair amount without opening anything up. Look along the wall for bowing in the middle third of its height, which suggests lateral pressure and inadequate reinforcement. Look for horizontal cracking near the middle, which in a basement wall is a warning sign rather than a cosmetic one, and for stair-step cracking through the joints at corners, which points to differential settlement. Look for a bond beam course near the top, for weeps at the base of anything retaining soil, and for evidence that the drainage has an outlet. A wall with no visible drainage provision and soil behind it is holding water every time it rains.

Frequently asked questions

Do all the cells need filling? No, and filling all of them is usually unnecessary expense. A design specifies which cells are grouted, typically those containing reinforcement plus cells at corners and openings. Grouting is about engaging the steel, not about making the wall solid.

Is block stronger than poured concrete? Poured concrete has higher compressive strength as a material, but a properly reinforced and grouted block wall performs comparably in residential applications. The decision is more often about access, speed, and cost than about raw capacity.

Can a block wall be insulated from inside? It can, and in a basement it commonly is, but the detail matters: an interior assembly that traps moisture against the block causes problems. Continuous rigid insulation with attention to vapour behaviour works better than framing tight to a damp wall.

Does Your Retaining Wall Need an Engineer?

In fifteen years of inspecting homes, the retaining walls I write up the most are the ones nobody thought needed a second look. A wall holds back tons of saturated soil, and when it fails it rarely gives much warning. So the question I get asked on almost every sloped lot is the same one: does this wall need an engineer, or can a good mason just build it? The honest answer is that it depends on height, load, and what the wall is holding back, and getting that call wrong is expensive.

Does Your Retaining Wall Need an Engineer?
Photo: KONGTSUIEN YuenaZie LauouH · CC0

The height rule most jurisdictions start with

As a rule of thumb, most building departments in the U.S. require a stamped engineering design once a retaining wall exceeds four feet measured from the bottom of the footing to the top of the wall. That four-foot line trips people up because they measure the exposed face, not the buried footing. A wall that looks like it stands three feet above grade may be a five-foot structural wall once you count the base that sits below the soil.

The threshold exists because the forces climb fast with height. Doubling the height of a wall roughly quadruples the overturning pressure at the base. A short garden wall is forgiving; a tall one is not.

When height isn’t the only trigger

Even under four feet, a wall can need an engineer if it is carrying what the codes call a surcharge, which is any extra load pressing on the soil behind it. Common surcharges include:

  • A driveway, parking pad, or road above the wall
  • A second wall stacked on the slope above (tiered walls)
  • A pool, deck footing, or structure near the top
  • A steep slope that keeps rising behind the wall rather than leveling off

Any of those can push a modest wall into engineered territory. I have seen three-foot walls fail under a driveway because nobody accounted for the weight of a parked truck.

What the engineering actually buys you

A stamped design specifies the footing size, the reinforcement, the drainage, and often the type of block or poured section. If you are weighing systems, the choice between block and poured concrete changes the engineering too, which I get into in the piece on segmental block versus poured concrete retaining walls. The design also documents that the wall was built to hold what it is holding, which matters at resale and matters more if a wall ever fails and an insurer starts asking questions.

Expect an engineered residential retaining wall to run somewhere in the range of $40 to $90 per square foot of wall face installed, depending on height, access, and whether you need drainage upgrades. The engineering itself is usually $800 to $2,500 for a straightforward residential wall. That is real money, but it is a fraction of what a rebuild costs after a collapse.

How to tell if your existing wall was ever engineered

Most older residential walls were not. If you are buying a home with a tall wall, ask for any permit records and drainage details. Look for weep holes or a drainage outlet at the base; their absence is the single most common reason walls lean and bulge over time. Building codes and load provisions are laid out in the International Building Code adopted by most jurisdictions, and your local building department can confirm the exact height trigger where you live through the International Code Council family of codes. When in doubt, a couple hundred dollars for an engineer to look at an existing wall is cheap insurance.

Frequently asked questions

Does a four-foot retaining wall always need an engineer? In most U.S. jurisdictions, yes, once the wall exceeds four feet from the bottom of the footing. Below that it usually does not, unless there is a surcharge load like a driveway or a tiered wall above it. Always confirm the exact trigger with your local building department, because some set the line lower.

Can a mason build a tall wall without engineering if I skip the permit? You can, but it is a bad idea. An unpermitted, unengineered tall wall can fail, is hard to insure, and often has to be torn out and rebuilt when you sell. The cost of doing it right the first time is far lower than a rebuild.

What makes a retaining wall fail even at a legal height? Poor drainage, almost always. Water building up behind a wall adds enormous pressure. A properly built wall has gravel backfill, a drain, and weep holes so water escapes rather than pushing the wall over.

Picking Patio Pavers: Brick Versus Concrete

Clay brick pavers and concrete pavers end up in the same aisle and get compared as if they were two finishes of one product. They are two different materials made by different processes, and almost every practical difference between them, in price, in appearance, and in how they age, comes from that.

One is fired, the other is cast

A clay paver is shaped from clay and fired at high temperature until the material vitrifies. The colour comes from the clay body and the firing, so it goes all the way through and there is no surface layer to lose. A concrete paver is cast from cement, aggregate, and pigment, then cured. That process is enormously more flexible: it produces any shape, any thickness, and any colour, including convincing imitations of stone and of clay brick itself. The trade-off is that the pigment is concentrated near the surface.

What the installed price actually reflects

Concrete units are generally less expensive per square foot, and the gap widens on large areas. But the material is a minority of the installed cost on any properly built patio, because the work is in the base: excavation, a compacted aggregate depth suited to the use, screeded bedding sand, edge restraint, and jointing. That base is identical whichever unit sits on top of it. Two quotes that differ substantially for the same patio are almost never differing on the paver.

Colour is the difference that shows in year fifteen

Clay holds its colour more or less indefinitely, because there is nothing to fade to. What it does instead is weather: it darkens, it picks up biological growth in shaded damp corners, and the result is generally considered attractive. Concrete pavers hold their appearance well for a long time and then gradually soften in colour, most visibly on the surfaces that get direct sun. Higher-quality units with pigment through the mix fade far less than budget ones with colour concentrated at the face. If a patio needs to look the same in twenty years, that is the argument for clay.

Where each one suits a yard

Clay suits period houses, formal layouts, and anywhere the brickwork of the building is part of the composition; it comes in a limited palette of earth tones and a limited set of shapes, and running bond or herringbone in a rectangular unit is most of what it does. Concrete suits contemporary schemes, large areas, and anything that needs a specific shape, a permeable system, or a stone appearance at a fraction of stone cost. It also handles curves and irregular boundaries better because of the range of shapes available. There is a practical consideration on top of the aesthetic one, which is availability over time. Clay pavers in a standard size stay available for decades and a later batch will blend acceptably. Concrete ranges get discontinued and reformulated, so a repair five years on may need units that no longer exist in that colour. Where a patio is likely to be extended later, or where a section may need lifting for access to something buried, keeping a pallet of the original units somewhere dry is worth more than it costs.

The base matters more than the choice

Whichever unit is chosen, the failure modes are shared and they all live underneath. An under-excavated or poorly compacted base settles unevenly. Missing or failed edge restraint lets the field spread sideways, which opens every joint at once. Joints allowed to empty destroy the interlock that makes a paved surface behave as one plane. Water that is not directed away undermines the base from below. None of that is affected by the material on top, which is why a well-built concrete paver patio outlives a badly built clay one by decades.

Frequently asked questions

Which one is more slippery? Both are acceptable when clean; the risk comes from what grows on them. Shaded, damp areas develop algae on either material, and that is a cleaning and drainage question rather than a material one.

Can individual pavers be replaced? Yes, and that is a real advantage of any unit paving over poured concrete. A damaged unit can be lifted and swapped. Matching is easier with clay, since concrete units from a later batch may not match a faded field.

Do paver patios need sealing? It is optional. The practical benefit is stabilising joint sand and slowing weeds rather than protecting the units, and many patios do well with good joint sand and periodic cleaning instead. In a subtropical climate the joint sand washes out faster and the interval shortens, so a Miami driveway contractor treats sealing as recurring maintenance rather than an option.

Why Chimney Crowns Fail (and How to Spot It)

I found my first failed chimney crown by accident, staring at a brown stain spreading across the plaster ceiling of my Decatur bedroom. I assumed the roof was leaking. It wasn’t. The water was coming down the inside of a century-old brick chimney because the crown, the concrete cap on top, had cracked and was funneling rain straight into the masonry. That repair taught me that the crown is the most ignored part of a chimney and one of the most important.

Why Chimney Crowns Fail (and How to Spot It)
Photo: Oliversamson1 · CC0

I’m a homeowner who restored an old brick house, not a chimney sweep, but I’ve climbed onto enough roofs since then to know what to look for. Here’s what a crown does, why it fails, and how to spot trouble before it reaches your ceiling.

What a chimney crown actually is

The crown is the sloped slab of concrete or mortar that covers the top of the chimney around the flue. It is not the same as the little metal or clay cap over the flue opening; the crown is the whole top surface. Its job is simple and critical: shed rain and snowmelt away from the flue and the brick below. A good crown is made of real concrete, slopes downward so water runs off, and overhangs the brick edge with a drip so runoff falls clear of the wall instead of down the face.

Plenty of crowns were built wrong from the start, troweled out of ordinary mortar, flat instead of sloped, with no overhang. Those start failing within a few years. A properly built concrete crown can last decades.

Why crowns fail

Almost every crown failure comes back to water and temperature. Here’s the cycle:

  • Shrinkage cracks: mortar-based or thin crowns crack as they cure and age, opening hairline gaps.
  • Freeze-thaw: water seeps into those cracks, freezes, expands, and widens them season after season.
  • Spreading damage: once water gets past the crown, it soaks the brick and flue liner below, causing spalling brick, rusted dampers, and stained ceilings.

Because brick chimneys are exposed on all sides and sit at the highest, most weather-beaten point of the house, they take more abuse than any wall. The Brick Industry Association’s technical notes on chimney and brick durability go deep on how moisture drives this deterioration, and it matches everything I saw on my own roof.

How to spot a failing crown

You can catch most of this from the ground with binoculars, and the rest from a ladder on a dry day. Look for:

  • Visible cracks across the crown surface, especially ones radiating out from the flue.
  • Chunks of concrete missing or crumbling at the edges.
  • Spalling or flaking brick in the top few courses of the chimney.
  • White efflorescence staining on the upper brick, a sign water is moving through.
  • Brown stains on interior ceilings or walls near the chimney.

A small crack caught early can often be sealed with a proper crown sealant or a crown coat for a few hundred dollars. A crown that has broken apart needs to be rebuilt, which commonly runs $500 to $2,500 depending on size and access. Left alone long enough, water damage forces the bigger question of whether to reline or rebuild the old chimney entirely, which is a far larger bill.

Why it’s worth checking now

A crown repair is one of the highest-return jobs on an old house because it protects everything below it. I put mine off for one winter out of ignorance and paid for it with interior plaster repair on top of the masonry work. Now I look at the crown every fall before the cold sets in. Five minutes with binoculars is cheap insurance against a stain you’ll notice from your bed.

Frequently asked questions

What’s the difference between a chimney crown and a chimney cap? The crown is the sloped concrete slab covering the entire top of the chimney; the cap is the smaller metal or clay cover over the flue opening that keeps out rain and animals. A chimney needs both, and they fail for different reasons.

How much does it cost to repair a chimney crown? Sealing minor cracks or applying a crown coat often runs a few hundred dollars. Rebuilding a failed crown commonly costs $500 to $2,500 depending on size, height, and roof access. Catching it while it’s still a crack is far cheaper than after water spreads.

How often should I check my chimney crown? Once a year is reasonable, ideally in fall before freeze-thaw season. A quick look with binoculars from the ground for cracks, crumbling edges, and stained brick will catch most developing problems early.