Category: Brick & Repointing

How to Tell When Mortar Has Failed

Out here in the Arizona desert, people assume masonry problems come from heat. They come from the mortar, same as everywhere else, the sun just hides it longer because things dry out fast between our monsoon soakings. Mortar is the sacrificial part of any masonry wall; it is meant to wear before the brick or block does. Knowing how to read it is the difference between a cheap repointing job now and a structural repair later.
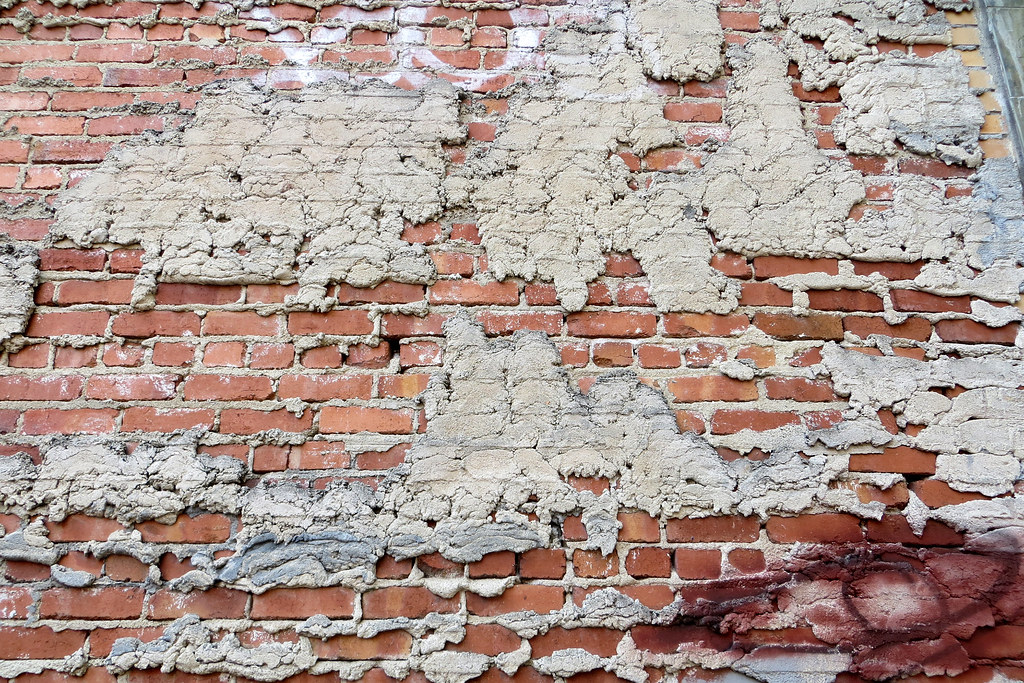
How to Tell When Mortar Has Failed
Photo: Amal Kumar ( https://polyhaven.com/all?a=Amal%20Kumar / https://web.archive.org/web/20230902205408/https://polyhaven.com/all?a=Amal%20Kumar ) via Poly Haven · CC0

Mortar is supposed to be the weak link

This surprises homeowners: mortar is designed to be softer than the units it holds. That way the mortar takes the stress of movement and weathering and can be replaced, while the expensive brick or stone stays protected. When people use a mortar that is harder than the brick, usually modern Portland-heavy mixes on old soft brick, the brick becomes the sacrificial part instead, and it spalls. So “failed mortar” is partly normal wear; the question is how far it has gone.

The signs, from minor to serious

Here is the progression I check, roughly in order of urgency:

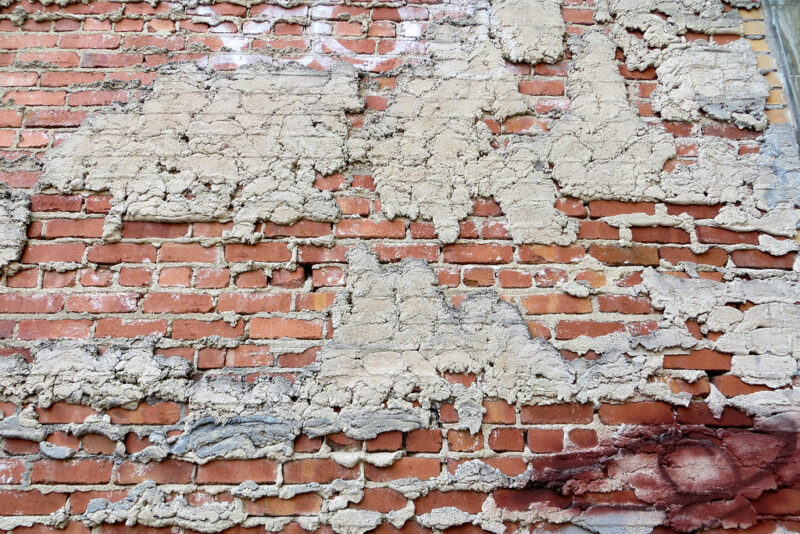
  • Powdering or sandy joints. Rub the joint; if it sheds sand, the binder is spent.
  • Receding joints. Mortar has weathered back behind the face of the brick, leaving a shelf that catches water.
  • Cracked or crumbling mortar you can pick out with a screwdriver or even a fingernail.
  • Gaps and missing sections where mortar has fallen out entirely and you can see daylight or feel a void.
  • Loose units. Brick or block that shifts when pushed, this is past cosmetic and into structural.

Once you see receding or missing mortar, water is getting into the wall, and stair-step cracking often follows, the pattern I break down in spotting structural cracks vs cosmetic cracks.

The screwdriver test

The simplest field check: take a flat screwdriver and press and scrape a joint. Sound mortar resists and stays put. Failed mortar gouges, crumbles, or falls away. Do this at a few spots around the wall, especially on the weather side and low near grade where water collects. If the joints are giving way in multiple places, the wall is telling you it is due for repointing.

What to do about it

The fix for failed mortar is repointing, raking out the bad mortar and packing in new, matched mortar, which I explain against the decorative technique in repointing vs tuckpointing. The critical part is matching the mortar to the wall, soft lime-based mortar on old soft brick, never a hard modern mix. The Brick Industry Association’s technical notes cover mortar assessment and matching through the Brick Industry Association. Catch failing joints early and repointing is routine maintenance; ignore them and water does the rest.

Where to look first, and how often

Mortar does not fail evenly across a wall, so knowing where to check saves time. Water drives most failure, so the joints that go first are the ones that stay wettest: the weather side of the house, anything under a leaking gutter or downspout, the low courses near grade where splashback and rising damp work on them, and the joints around windows, sills, and copings where water concentrates. Chimneys above the roofline take the worst of the weather and are worth a look every time you are up there. I tell homeowners to walk their masonry once a year, ideally in spring after the wet season has done its work, and run the screwdriver test at those high-risk spots rather than randomly. In the desert I add a check after monsoon season, since that is when a year’s worth of water arrives at once. Catching a few soft joints early turns repointing into a small, scheduled job instead of an emergency, and it keeps water out of the wall before it can reach the brick faces and cause the spalling that is far more expensive to fix.

Frequently asked questions

How do I know if my mortar needs repointing? Check the joints: powdery, sandy, cracked, receding, or missing mortar all signal failure, as do loose bricks. The screwdriver test, scraping a joint to see if it holds or crumbles, is a quick field check. Failing joints in multiple spots mean it is time to repoint.

Is crumbling mortar a serious problem? It becomes serious once joints recede or open up, because water then enters the wall and accelerates damage, and loose units mean the wall is losing integrity. Caught early as surface wear, it is routine maintenance; left long enough, it leads to structural repair.

Why is my brick cracking instead of the mortar? Usually because someone used mortar harder than the brick, often a modern Portland mix on old soft brick. Mortar is supposed to be the softer, sacrificial element. When it is too hard, the brick takes the stress and spalls instead. Matching mortar strength to the brick prevents this. Moisture arriving from inside the wall does the same damage, which is why a Tarrytown HVAC contractor gets called when a flue or vent turns out to be the source.
Repointing, Tuckpointing, and Pointing Explained

Three words get used interchangeably on quotes and they do not mean the same thing. One describes finishing joints on new work, one describes a repair, and one describes a decorative technique that almost nobody actually performs any more. Knowing which is which changes how you read a bid, because the labor involved differs enormously.

Three words for three different operations

Pointing is the finishing of mortar joints as a wall is being built, shaping and compacting the mortar while it is still workable. Repointing is a repair: raking out failed mortar from an existing wall and replacing it with new. Tuckpointing is a decorative technique in which a coloured mortar matching the brick is applied and a fine contrasting line is set into it, producing the appearance of very precise thin joints on brickwork that is not that precise. In practice, most contractors say tuckpointing when they mean repointing, and most quotes that use the word are describing a repair.

What repointing actually involves

The work is mostly removal. Deteriorated mortar is cut out to a depth of roughly two to three times the joint width, which is deep enough for the new mortar to key in and not so deep as to disturb the wall. The cavity is cleaned and dampened, then filled in layers, each compacted before the next, and the joint is finished to profile at the right moment in the set. The skilled part is the raking out: done with an aggressive angle grinder in the wrong hands, it widens joints and chips brick edges permanently, and no amount of care with the new mortar hides it.

Why the words matter on a quote

A quote for tuckpointing at a low square-foot rate is almost certainly repointing, and that is fine, but it is worth confirming what depth of raking out is included and what mortar specification will be used. A quote for genuine tuckpointing should carry a much higher rate, because it is a slow decorative process. Where the two get conflated is where disputes start: the owner expected the fine-lined finish and received a competent repair, or expected a repair and is being charged for craftsmanship the wall does not need.

The mortar specification is the whole job

Everything else is secondary to getting the mix right. Mortar is meant to be weaker than the units around it, so that movement and salts are taken up by the joint rather than the brick. On older walls built with lime mortar, replacing it with a hard cement-rich mix creates a joint stronger than the brick, which forces moisture and stress into the brick face and spalls it. That damage is permanent and it is caused by the repair. Matching the existing mortar in strength, composition, and appearance is what separates repointing that lasts from repointing that destroys a wall slowly.

The joint profile is a weather decision

How the joint is finished is not only cosmetic. A concave or weathered profile is compacted and sheds water, which is why it is standard on exposed elevations. A raked or recessed joint creates a shadow line that looks striking and holds water on the upper ledge of every course, which in a freeze-thaw climate is a durability question rather than a style question. Matching the original profile also matters visually: a repointed patch finished differently from the surrounding wall reads as a patch from across the street, however good the mortar match is.

Frequently asked questions

How long should repointing last? Decades when correctly specified and executed, often comparable to the original mortar. Repointing that fails within a few years usually failed on preparation, insufficient raking depth or dirty joints, rather than on the mortar itself.

Does the whole wall need doing at once? No. Repointing is normally done where the mortar has failed, commonly on the most weather-exposed elevations first. Doing sound joints wastes money and disturbs a wall unnecessarily.

Why does mortar type matter so much? Because old brick is soft and needs a soft lime-based mortar that can move with it. Hard modern cement mortar is stronger than the brick and drives moisture and stress into the brick face, cracking and spalling it. Interior trim follows the same logic in reverse, since timber moves and its fixing has to allow for it, which is why a custom millwork shop will not pin a panel rigidly to masonry.

Brick Cleaning and Restoration in Historic Philadelphia

The first time I inspected a Society Hill townhouse, the owner proudly told me they had the front cleaned with a pressure washer the summer before. I could see exactly where the wand had been: the soft 18th-century brick had a faint corduroy pattern of erosion, and the fired skin that protects the brick was gone in patches. Philadelphia has some of the oldest brick housing stock in the country, and cleaning it wrong does damage you cannot undo. Restoration here is a specialty, not a weekend job.

Brick Cleaning and Restoration in Historic Philadelphia
Photo: lisafree54 · CC0 1.0

Why old Philadelphia brick is so unforgiving

Brick made before the 20th century was fired in less consistent kilns at lower temperatures. The result is a brick with a hard outer skin and a much softer body. That skin is everything. Once you blast, grind, or acid-burn it off, the exposed body soaks up water and starts to erode and spall, especially through Philadelphia’s freeze-thaw winters. Society Hill, Old City, and the older stretches of South Philadelphia are full of homes where a single aggressive cleaning in the 1980s is still causing decay today.

The right way to clean historic brick

Preservation practice follows a simple principle: use the gentlest method that works. That means starting with plain water and soft brushes, stepping up to specialized low-pressure systems and masonry-safe detergents only as needed, and testing every method on a hidden patch first. The National Park Service lays this out in its widely used guidance on cleaning historic masonry through the Preservation Briefs, and any serious restoration mason in the city will know it cold. The methods that are explicitly discouraged, high-pressure blasting, sandblasting, and harsh acids, are exactly the ones cheap operators reach for because they are fast.

Cleaning is only half of restoration

On most historic Philadelphia rowhomes, the brick and the mortar need attention together. Decades of grime usually sit alongside failed joints, and repointing old brick requires a soft lime-based mortar that matches the original, not the hard modern Portland mix that cracks the surrounding brick. When you are choosing someone for this work, look specifically for a restoration background rather than a general mason; hiring a Philadelphia restoration mason who has worked on protected historic facades is the difference between a house that looks right for another century and one that has to be patched again in five years. The gentle-cleaning mindset carries straight over to maintenance, which I cover in cleaning brick without damaging the mortar.

What restoration costs and what to watch for

Gentle cleaning of a rowhome facade typically runs $8 to $20 per square foot depending on the condition and the method, and full restoration that includes repointing and spot brick replacement can push well beyond that on a historic property. It is more than a pressure-wash quote, and it should be. In many Philadelphia historic districts, exterior work also needs Historical Commission review, so confirm approvals before anyone touches the wall. The expensive mistake is not the restoration; it is the cheap cleaning that forces a restoration a few years early.

Why the cheap cleaning costs the most

The pattern I see over and over in these old neighborhoods is a homeowner who saved money on a cleaning and paid for it twice. A pressure-wash or acid clean is fast and cheap because it is aggressive, and aggressive is exactly what soft historic brick cannot take. The fired skin comes off, the exposed body starts drinking water, and within a few winters the same facade needs real restoration, replacing spalled brick, repointing with matched mortar, work that costs many times what a gentle cleaning would have. So the true price of the bargain job is the restoration it forces early, plus the loss of original brick that can never be perfectly matched. On a century-old Philadelphia rowhome, the gentlest effective method is not just the safest choice, it is the cheapest one measured over the life of the wall. Spend a little more up front on the right approach and you spend far less over the decades you own the house.

Frequently asked questions

Can I pressure wash my historic brick house? No, not with standard high pressure. It strips the hard fired skin off soft older brick and accelerates erosion and spalling. Historic brick should be cleaned with the gentlest effective method, usually low pressure, water, and soft brushing, tested on a hidden area first.

Do I need approval to clean or restore a facade in a Philadelphia historic district? Often yes. Exterior work on properties in designated historic districts typically requires Historical Commission review before you start. Check with the city and your contractor before any cleaning, repointing, or brick replacement begins.

Why can’t I use regular mortar to repoint old brick? Old soft brick needs a soft lime-based mortar. Hard modern Portland-cement mortar does not flex with the brick and forces moisture and stress into the brick face instead of the joint, causing the brick to crack and spall. Matching the original mortar is essential on historic work.

Why Atlanta Brick Fails Sooner in Georgia Humidity

My house in Decatur was built in the 1920s, and its brick had survived a full century by the time I bought it. So I was surprised, three summers in, to find the south-facing wall shedding thin flakes of brick face onto the flower bed. A neighbor’s much newer brick was doing the same thing. The bricks weren’t defective. They were living in Georgia, and Georgia is harder on masonry than its mild reputation suggests.

Why Atlanta Brick Fails Sooner in Georgia Humidity
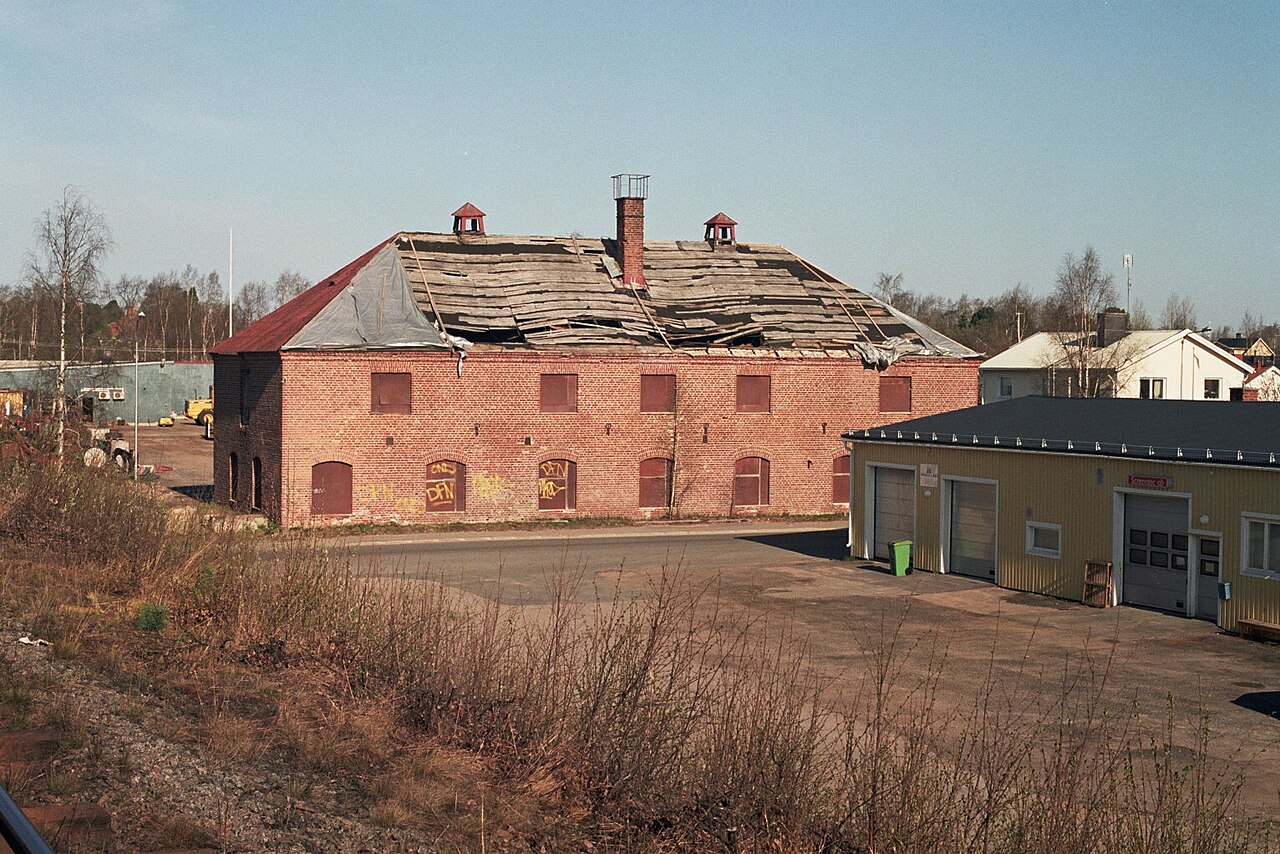
Photo: Methem (Mikko J. Putkonen) · BY

I’ve spent years restoring that house, and the humidity is the quiet villain behind most of what goes wrong with brick around Atlanta. Here’s what I learned watching my own walls and asking a lot of questions.

Why Georgia’s climate works against brick

Brick is porous. It drinks water, then it needs to dry. Around metro Atlanta we get heavy rain, long stretches of high humidity, and just enough winter cold to matter. Water soaks into the brick and mortar, and when a cold snap freezes that trapped moisture, it expands and pushes the brick face apart. That flaking and crumbling is called spalling, and while our winters are milder than the upper Midwest, we still get enough freeze-thaw cycles to do slow damage, especially on walls that stay damp because they never catch afternoon sun.

Humidity makes it worse by keeping everything wet longer. A wall in Wisconsin freezes hard and then dries out; a wall in Decatur can stay damp for days, and constant moisture is what feeds the two problems below.

The red clay problem underneath

Georgia’s famous red clay is expansive soil. It swells when it’s wet and shrinks when it’s dry, and it does this season after season. That movement travels up into foundations and brick walls as stair-step cracks through the mortar joints, usually near corners and windows. On my house the worst cracking followed a drought year, when the clay shrank away from the footing and a corner settled. Expansive clay is why so many older brick ranch and Craftsman homes here show cracking that has nothing to do with the quality of the brick; it’s the ground moving.

If you’re seeing new or widening cracks, that’s worth a professional look sooner rather than later. When I finally brought in an Atlanta masonry contractor to assess mine, the fix was as much about drainage and soil moisture as it was about the brick itself.

Efflorescence and biological staining

Two cosmetic-but-telling problems show up constantly on humid-climate brick. The first is efflorescence, the chalky white haze that appears when water moves through masonry and leaves salts on the surface. It’s a signal that water is getting in and out of the wall. The second is the green and black biological staining, meaning algae, mildew, and moss, that thrives on shaded, damp brick through our long warm season. I used to scrub the white haze off and assume I’d solved something. I hadn’t. It’s worth understanding the causes before you clean, which is why I dug into what causes efflorescence on brick and block and how to actually fix it.

What actually helps

The fixes that lasted for me were about water, not appearance. Keeping gutters clean and downspouts running well away from the wall did more than any product. Repointing failed joints with an appropriately soft mortar let the wall breathe instead of trapping moisture. I stayed away from film-forming “waterproof” paints and sealers, which can trap moisture behind the brick and speed up spalling; the Brick Industry Association’s technical resources on moisture and brick durability spell out why breathable is better. Expect real repair work here: repointing commonly runs $8 to $20 per square foot, and replacing spalled brick with matched units often adds $15 to $30 per brick. It isn’t cheap, but catching it early beats rebuilding a wall.

Frequently asked questions

Does humidity really make brick fail faster? Yes, indirectly. Humidity keeps brick and mortar damp longer, and moisture is what drives spalling, efflorescence, and biological staining. Brick that can dry out between rains lasts far longer than brick that stays wet in shade.

Is spalling brick on my Atlanta home an emergency? Usually not immediately, but it won’t stop on its own. Once the hard outer face flakes off, the softer interior absorbs even more water and deteriorates faster. Addressing drainage and repointing within a season or two is a reasonable timeline.

Should I seal my brick to protect it from Georgia weather? Be careful. Film-forming sealers can trap moisture and make spalling worse. If any sealer is used, it should be a breathable, vapor-permeable type, and fixing drainage and mortar usually matters more than any coating.

Repointing Historic DC Rowhouses: Costs and Preservation Rules

On a Capitol Hill block near Lincoln Park last fall, I watched a crew grind the mortar out of an 1890s brick rowhouse with an angle grinder and no jig, chewing the edges of the soft historic brick as they went. The owner thought she’d found a bargain. What she’d actually bought was damage that will cost more to fix than the repointing did.

Repointing Historic DC Rowhouses: Costs and Preservation Rules
Photo: Jebulon · CC0

I do stone and hardscape work, not full facade restoration, but I’ve stood on enough Capitol Hill scaffolds to know how this goes right and how it goes wrong. Repointing an old rowhouse is one of those jobs where the cheap version is genuinely worse than doing nothing. Here’s what the work involves, what the rules require, and what it should cost.

What repointing is, and when a rowhouse needs it

Repointing means raking the failed mortar out of the joints to a sound depth, usually about an inch, and packing in fresh mortar. You need it when the joints have receded, the mortar crumbles to sand under a key, or water is finding its way in through open seams. On Capitol Hill’s 100-plus-year-old brick, that day comes for every house eventually, because the original lime mortar was designed to wear before the brick does. Recognizing worn mortar early is the whole game; I cover the warning signs in a separate piece, but the short version is that soft, receding, or missing joints mean it’s time.

The preservation rules on Capitol Hill

Capitol Hill is a designated historic district, so exterior masonry work on a contributing building generally needs a permit and historic review before you start. The single best reference for doing it correctly is the National Park Service Preservation Brief on repointing, which sets the standard the review boards lean on. I’d read the NPS Preservation Briefs before you interview a single contractor, because it will tell you what good work looks like and let you spot a crew that’s about to cut corners. Reviewers care about mortar composition, joint profile, and how the old mortar is removed, and grinding wide joints with a power wheel is exactly the kind of thing that gets flagged.

Why the mortar matters more than anything

Hundred-year-old rowhouse brick was laid in soft, breathable lime mortar. Modern Portland-based mortar is far harder, and when it’s packed into an old wall it traps moisture and forces the expansion stress into the brick faces instead of the joints, spalling the brick over a few freeze-thaw cycles. Matching the original in strength, composition, color, and joint profile is the entire craft here, and it’s worth understanding how mortar is matched on century-old brick before you approve a mix. For a contributing rowhouse, I’d only hand this to a DC masonry contractor who can show you lime-mortar repointing they’ve completed and photos the review board actually approved.

What historic repointing costs

Hand-repointing historic brick on Capitol Hill commonly runs $12 to $30 per square foot of wall, with the front facade of a typical rowhouse landing somewhere between $8,000 and $20,000 depending on height, condition, and access. Custom mortar analysis and color matching adds roughly $300 to $1,000. Historic review and permit fees are extra, and the approval can add four to eight weeks before work begins. A power-grinder crew will quote well under those numbers, and that gap is the sound of your brick being damaged; salvaged replacement brick alone can run $15 to $40 apiece once the edges are chewed up.

Getting the sequence right

Do the paperwork first. Get the mortar matched, get the review approval, then let a careful crew rake by hand or with a proper joint-width blade and jig. Repointing done right on a Capitol Hill rowhouse should last 50 to 100 years. Done wrong, you’ll be paying to undo it inside a decade.

Frequently asked questions

Do I need approval to repoint a Capitol Hill rowhouse? Usually yes. On a contributing building in the historic district, exterior repointing typically requires a permit and historic review covering the mortar and the method. Confirm before you start, because unapproved work can be ordered redone.

Why can’t the contractor just use standard bagged mortar? Standard bagged mortar is high in Portland cement, which is harder than old brick. On a soft historic wall it traps moisture and spalls the brick faces over a few winters. Historic brick needs a softer, lime-based mortar matched to the original.

How do I know if a low bid is too cheap? If the price is far below $12 per square foot and the crew plans to grind joints with a wheel and use off-the-shelf mortar, that’s a warning sign. Proper hand-repointing with matched lime mortar simply costs more, and it protects the wall instead of harming it.

Brick Spalling: Causes and What to Do About It

Spalling is the word for brick that is flaking, chipping, or popping its face off, and on the older rowhouses I manage around Petworth in DC, it is the damage I take most seriously. Not because a little surface flaking is a crisis, but because spalling is almost always a symptom of a moisture problem that will keep working until you find it. Treat the flaking and ignore the cause and you will be treating it again every couple of years.

Brick Spalling: Causes and What to Do About It
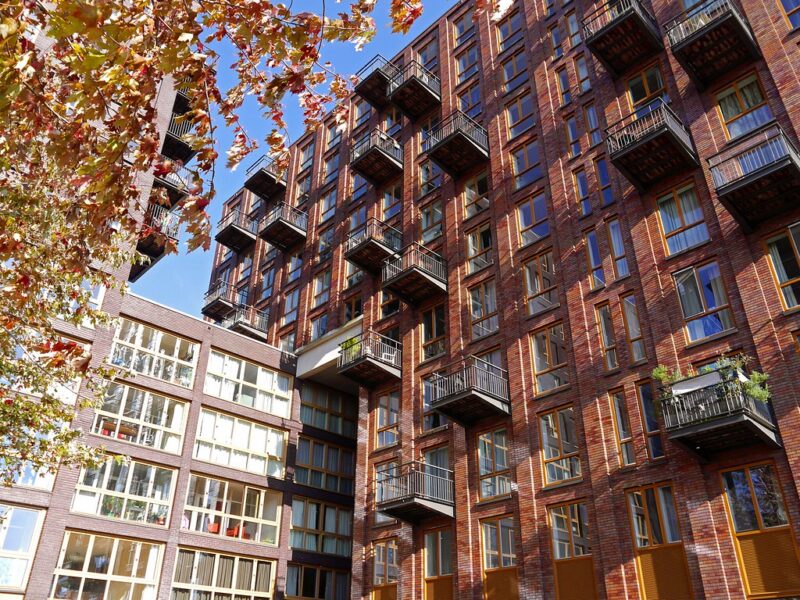
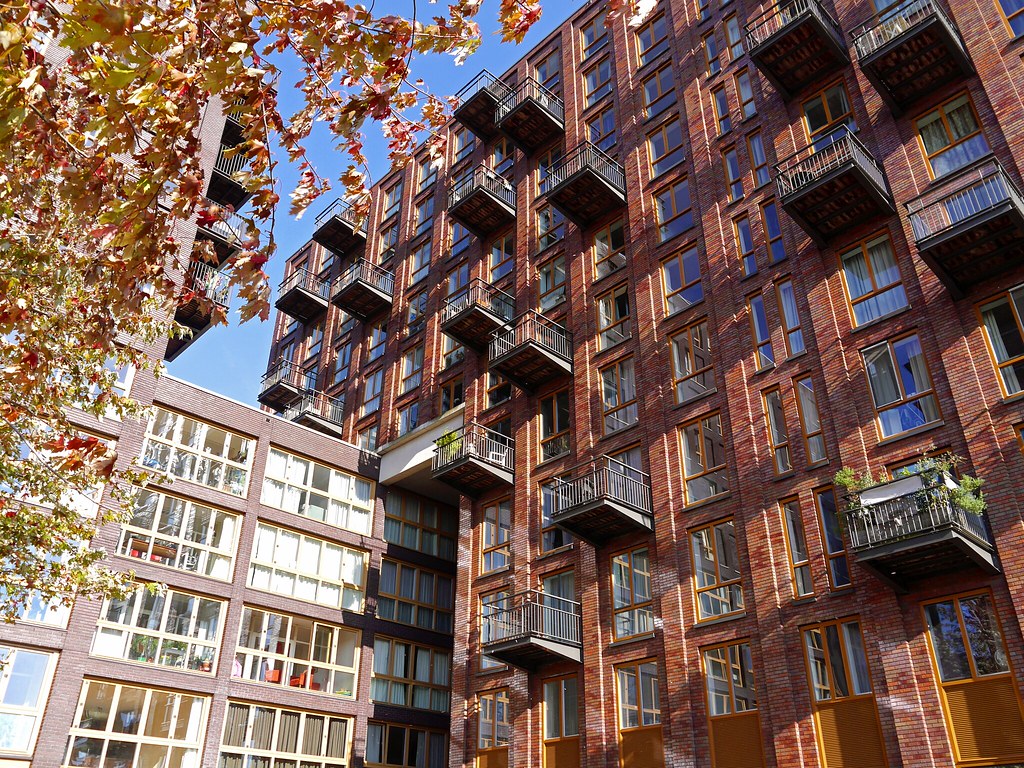
Photo: Amsterdam free photos & pictures of the Dutch city · CC0 1.0

What spalling actually is

Spalling is the brick’s hard outer face breaking away, exposing the softer, more porous body underneath. Once that skin is gone, the brick soaks up even more water and deteriorates faster, so spalling accelerates itself if left alone. It shows up as flaking faces, pitting, and little piles of brick crumbs at the base of a wall. On a historic wall it is heartbreaking, because you cannot glue the face back on, spalled brick has to be repaired or replaced.

The usual causes

Behind almost every spalling wall is water plus one aggravating factor:

  • Freeze-thaw, water in the brick freezes, expands, and pops the face, the dominant cause in DC’s cold snaps
  • Hard mortar on soft brick, which forces stress and moisture into the brick face instead of the joint (the mismatch I cover in matching mortar on 100-year-old brick)
  • Trapped moisture, often from a film-forming sealer or paint that would not let the wall breathe
  • Chronic wetting, from a leaking gutter, failed flashing, or sprinklers hitting the wall
  • Rising damp, ground moisture wicking up into brick near grade

What to do about it

The order matters: find and stop the water first, then repair the brick. Repairing spalled brick without fixing the moisture source just resets the clock. Once the cause is addressed:

  • Lightly spalled brick may be stabilized, but heavily spalled units usually need replacement with matching brick
  • Failed joints should be repointed with the correct soft mortar
  • Any film-forming sealer or trapping paint should be removed so the wall can breathe again

Prevention is cheaper than repair

Keeping brick from spalling comes down to moisture control: sound mortar joints, working gutters and flashing, water draining away from the wall, and, where a finish is truly needed, only a breathable penetrating repellent, never a film former. The Brick Industry Association’s technical notes address spalling causes and prevention through the Brick Industry Association. If your brick is starting to flake, do not reach for sealer or paint first, find the water, because the flaking is the wall telling you where it is getting in.

Painted brick and the trap it sets

A particular version of the spalling problem shows up on the painted rowhouses all over DC, and it catches owners off guard. Ordinary exterior paint forms a film on the brick, and like a film-forming sealer it blocks the wall from breathing. Moisture that gets behind the paint, and it always does, through a crack, a failed sill, rising damp, cannot escape as vapor, so it drives the paint off in sheets and takes the brick face with it. That is why so many painted brick facades spall worse than bare ones once the paint starts to fail. The trap is that the fix is not simply repainting, which just re-seals the moisture in, nor is it always safe to strip the paint, since aggressive stripping can damage soft old brick and older paint may contain lead. On a painted historic wall, the right move is usually to address the water source first, repair any spalled brick, and then use a breathable masonry coating designed to let the wall dry rather than a standard film paint. If you own painted brick and it is starting to flake, treat it as a moisture-and-breathability problem, not a paint-color problem.

Frequently asked questions

What causes brick to spall or flake? Moisture plus an aggravating factor, most often freeze-thaw (water freezing inside the brick and popping the face), hard mortar on soft brick, trapped moisture from film-forming sealers or paint, or chronic wetting from leaks and poor drainage. The face breaks away and the exposed brick then deteriorates faster.

Can spalled brick be repaired? Lightly spalled brick can sometimes be stabilized, but heavily spalled units generally must be replaced with matching brick, you cannot reattach the lost face. Crucially, the moisture cause must be fixed first, or the replacements and repairs will spall too.

Will sealing brick stop spalling? Not if you use the wrong sealer, a film-forming coating traps moisture and makes spalling worse. Spalling is a moisture problem, so the fix is finding and stopping the water (leaks, freeze-thaw exposure, hard mortar). Only a breathable penetrating repellent is appropriate, and only after the cause is addressed.

Matching Mortar on 100-Year-Old Brick

The most expensive masonry mistake I ever inherited was on a century-old building in Chestnut Hill. A previous manager had hired someone to repoint the front with standard modern mortar. Five years later the beautiful old brick was spalling, its faces popping off in sheets, while the new mortar sat there hard as a rock. That is the signature of mismatched mortar, and on old brick it is not a cosmetic issue, it is slow destruction. Matching mortar to old brick is the single most important thing to get right on a historic building.

Matching Mortar on 100-Year-Old Brick
Photo: Anonymous Unknown author · PDM

Why old brick needs soft mortar

Brick made a hundred years ago is softer and more porous than modern brick, and the buildings were assembled with soft, lime-based mortar. That softness is intentional and it is a system: the mortar is meant to be the weaker, sacrificial element. When the wall moves with temperature and moisture, or when water needs to escape, it does so through the soft mortar joints, protecting the brick. Replace that soft mortar with hard modern Portland-cement mortar and you invert the system. The hard mortar will not budge, so the stresses and the escaping moisture go through the brick face instead, and the brick spalls.

What “matching” actually means

Matching historic mortar is more than color. A proper match considers:

  • Strength and composition, a lime-rich mix soft enough to be weaker than the brick, often a lime-sand mortar with little or no Portland cement
  • Color, from the sand and any pigment, matched to the original
  • Sand gradation and texture, so the new joint reads like the old
  • Joint profile, tooled to match the original shape

Getting this right often means having a sample of the original mortar analyzed. The National Park Service’s Preservation Briefs cover repointing historic masonry in detail through the Preservation Briefs, and any competent preservation mason works from that standard.

The test that proves the point

Here is the rule of thumb the trade uses: the mortar should always be weaker than the masonry units. If you can scratch the cured mortar with a nail more easily than you can scratch the brick, you are in the right territory. A mortar harder than the brick is a red flag no matter how neat it looks. This connects directly to reading joint failure in the first place, which I cover in repointing vs tuckpointing.

Why it is worth the fuss

Proper historic repointing costs more, the materials are specialized and the work is slow and skilled, commonly $15 to $30 per square foot or more on historic walls. But the alternative is watching irreplaceable century-old brick destroy itself. On an old building, insist that anyone bidding repointing can tell you the mortar type they will use and why. If their answer is “standard mortar,” keep looking.

Why the old lime mortar was smarter than it looks

It is tempting to think our ancestors used soft lime mortar because they did not have anything better, but the old builders understood something we relearned the hard way. Lime mortar is not just soft, it is self-healing in a modest way: fine cracks can re-close as the lime slowly reacts with moisture and carbon dioxide over time, a property called autogenous healing that a rigid cement mortar simply does not have. Lime mortar also lets a wall breathe, moving moisture out through the joints rather than trapping it in the brick. And because it is weaker than the brick, it accommodates the small seasonal movements of an old building instead of resisting them until something cracks. Modern Portland-heavy mortar is stronger and sets faster, which is why it took over for new construction, but on a soft old wall those same qualities become liabilities. When a preservation mason insists on a lime-based mix, they are not being precious about historical accuracy; they are matching the mortar to how the wall was designed to work, which is the only way it lasts another hundred years.

Frequently asked questions

Why can’t I use regular mortar on old brick? Because old brick is soft and needs a soft, lime-based mortar that is weaker than the brick. Hard modern Portland-cement mortar does not flex or let moisture escape, so stress and water are forced through the brick face instead, causing it to crack and spall. The mortar must be the sacrificial element.

How do I match mortar on a historic building? Match strength and composition (a soft lime-rich mix), color, sand texture and gradation, and joint profile to the original, ideally by having a sample of the old mortar analyzed. Color alone is not enough; the strength and breathability are what protect the brick.

How can I tell if mortar is too hard for my brick? The mortar should be softer than the brick, if a nail scratches the cured mortar more easily than the brick, you are in the right range. Mortar that is harder than the surrounding brick, no matter how neat it looks, will drive spalling and is the wrong mix for old masonry.

What Brick Repointing Costs in Philadelphia Rowhomes (2026)

Last spring a guy in Fishtown flagged me down while I was loading the truck two doors up. He’d been poking at the mortar joints on his rowhome with a screwdriver and it was coming out like brown sugar. “Is that bad?” he asked. I gave him the honest answer: when the joint gives up before the brick does, that’s the mortar doing its job, and now it’s your turn to do yours. I’ve been laying and repointing brick for over thirty years, a good chunk of it on Philadelphia rowhomes, and repointing is the single most common repair I get called for around here.

What Brick Repointing Costs in Philadelphia Rowhomes (2026)
Photo: Ammodramus · CC0

Repointing means grinding or raking out the old failed mortar and packing in fresh. It’s not glamorous work, but on a brick rowhome it’s the difference between a wall that lasts another eighty years and one that lets water in behind the brick. And in this city, water behind the brick means freeze-thaw, and freeze-thaw means spalled faces and blown-out joints by March.

What repointing actually costs in Philadelphia

For 2026, on a typical Fishtown or Kensington rowhome, I tell people to budget $12 to $28 per square foot of wall face for proper repointing. A single front facade, say the second and third floors above the cornice line, often lands in the $3,000 to $9,000 range. A full front, or a front plus a chimney and parapet, can run $8,000 to $18,000 once you factor in scaffolding. These are estimates, not quotes. The only honest number comes after someone stands on the wall and reads it.

What drives the number up or down

  • Access. Rowhomes share walls, so I almost never work a three-story front off ladders. That means pump jacks or pipe scaffold, and sometimes a street-closure permit from L&I if I’m hanging over the sidewalk.
  • How much has failed. Spot-pointing a few soft joints is cheap. Cutting out one hundred percent of the joints on a weathered south face is a different animal.
  • Matching the mortar. Older Philly brick is soft, and it was laid in lime mortar. Repointing it with hard modern Portland mortar traps moisture and cracks the brick faces. I’ve torn out plenty of well-meaning “repairs” that did exactly that.
  • Historic districts. Parts of Society Hill and Old City carry review requirements, and that changes both the schedule and the mortar spec.

If you’re not sure whether your joints are actually shot or just dirty, learn how to tell when mortar has failed before you spend a dime. Half the “emergencies” I get called to look at are cosmetic.

Why the mortar mix matters more than the price

This is the part cheap crews get wrong. A century-old rowhome brick wants a soft, lime-based mortar that flexes and breathes. Slap a bag of high-strength Portland on it because it’s fast and cheap, and the mortar becomes harder than the brick. So when the wall moves, the brick spalls instead of the joint. The National Park Service lays this out plainly in its preservation briefs on repointing historic masonry, and every good mason in this town follows the same logic whether the house is “historic” on paper or not. When you’re vetting a crew for Philadelphia masonry, ask what mortar type they’ll use and why. If they can’t answer, keep walking.

Getting it done right in a Philly winter

You cannot repoint in the cold. Fresh mortar needs to cure above about 40 degrees Fahrenheit, and if it freezes green it never gains strength. I won’t schedule exterior pointing here from roughly December through February unless we tent and heat the wall, and that costs more. The best window in Philadelphia runs April through early November. Book spring work in January or February, because the good crews fill up fast.

One more thing from thirty years of this: repointing buys you decades, but only if the rest of the wall stays dry. Check your gutters, your coping, and the flashing where the parapet meets the roof. I’ve repointed beautiful walls that failed again in five years because nobody fixed the busted downspout dumping water down the brick.

Frequently asked questions

How long does repointing last? Done right with the correct lime-based mortar, repointing on a Philadelphia rowhome should last 50 to 100 years. Done with the wrong hard mortar, you can see failure again in 5 to 10.

Do I need a permit to repoint my rowhome? Like-for-like repointing usually doesn’t require a building permit in Philadelphia, but scaffolding over the sidewalk or work in a historic district can trigger L&I or historical review, so check before you start.

Can I just repoint the front and skip the rest? Yes, and most people do. The weather-facing front and any chimney or parapet take the worst beating, while rear and party walls can often wait as long as they aren’t actively leaking.